Introduction
Cherry Drawing has become more popular in recent years, with artists of all ability levels seeking to portray the beauty of nature’s gift. Among the various fruits, painters choose to draw, cherries are an excellent place to start. Cherries are tiny, vivid, and full of character, making them a perfect subject for beginners to develop their sketching abilities. This article will present ideas and tactics for novices to enhance their cherry drawing abilities and produce gorgeous artwork.
Materials Needed for Cherry Drawing
Before entering into Cherry Drawing, it’s vital to acquire the appropriate supplies. The essential supplies for cherry drawing are pencils, paper, erasers, and a sharpener. When it comes to pencils, it’s advisable to have a variety of graphite pencils with varying hardness levels, such as 2B, 4B, and 6B. These pencils will help you to produce a range of tones and textures in your drawings. As for paper, a smooth surface is great for intricate cherry drawings. Bristol board or drawing paper weighing 90-140 lb is a suitable option.
In addition to the essential supplies, a few supplementary instruments might improve your cherry sketching experience. Blending stumps or tortillons may blend and smooth out graphite or colored pencil markings. A kneaded eraser is also effective for lifting graphite or colored pencil traces and generating highlights. For those interested in adding color to their cherry drawings, colored pencils or watercolor pencils may be employed.
Gift:
Claim our premium worksheet practice book For Free (Only for you):
Understanding the Anatomy of a Cherry
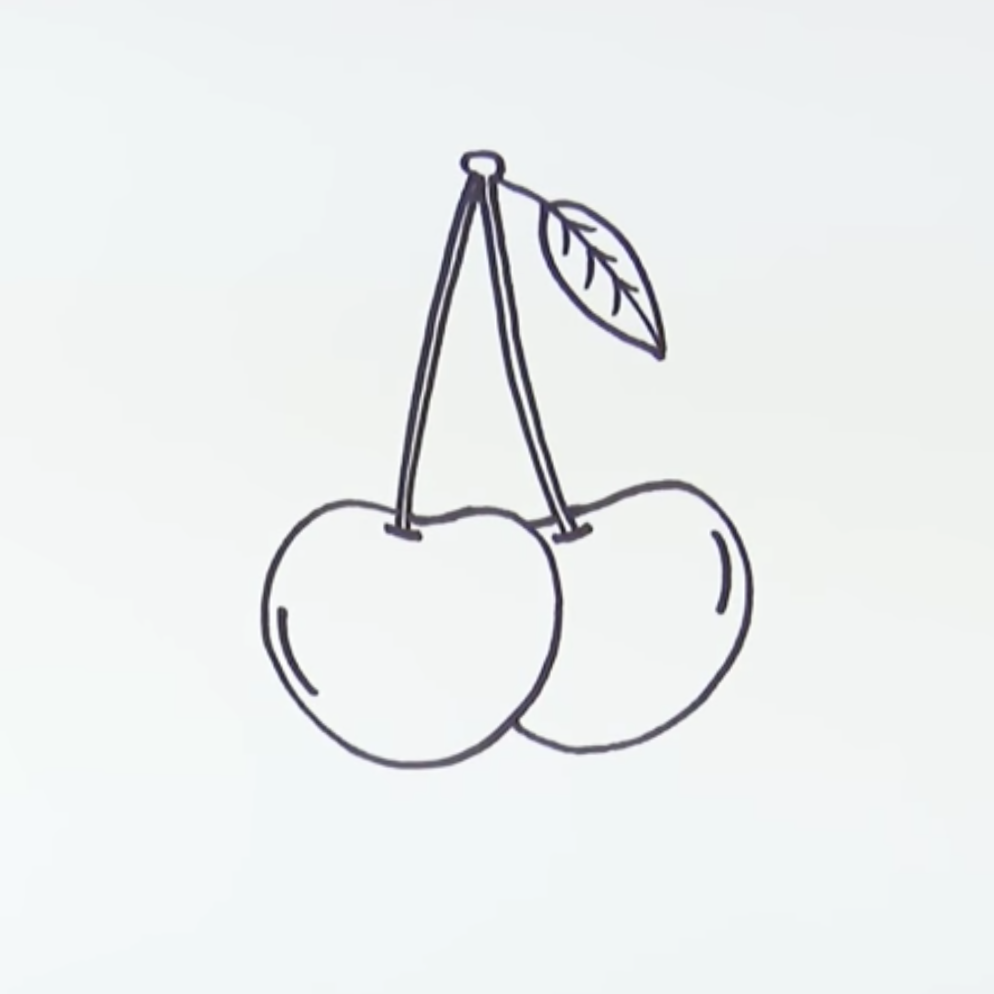
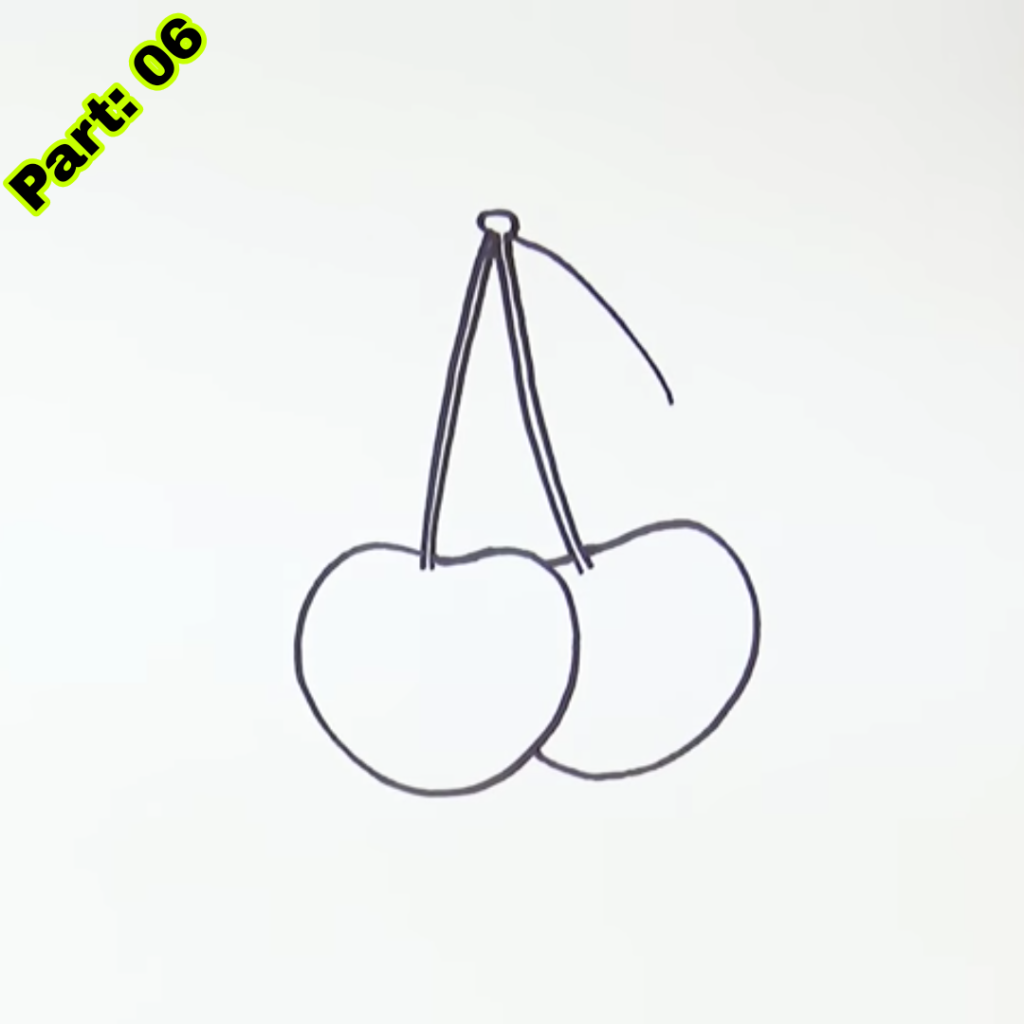
To effectively show cherry in your drawings, it’s vital to grasp their anatomy. Cherries consist of multiple parts: the stem, calyx (the green leaf-like structure at the top), skin, meat, and pit. When sketching cherries, pay attention to the form and size of each portion. The stem is generally narrow and bent, while the calyx has a star-like structure with pointed edges. The skin of cherry is smooth and lustrous, with modest color variations. The meat is delicate and delicious, with a somewhat lighter hue than the skin. The pit is positioned in the core of the cherry and is typically not visible in a drawing.
To get a genuine appearance, inspect cherries thoroughly and analyze their details. Notice how the skin reflects light and forms highlights and shadows. Pay attention to the minor changes in color and texture. By knowing the anatomy of a cherry and analyzing its distinct traits, you will be able to portray it in your drawings appropriately.
Sketching Techniques for Cherry Drawing
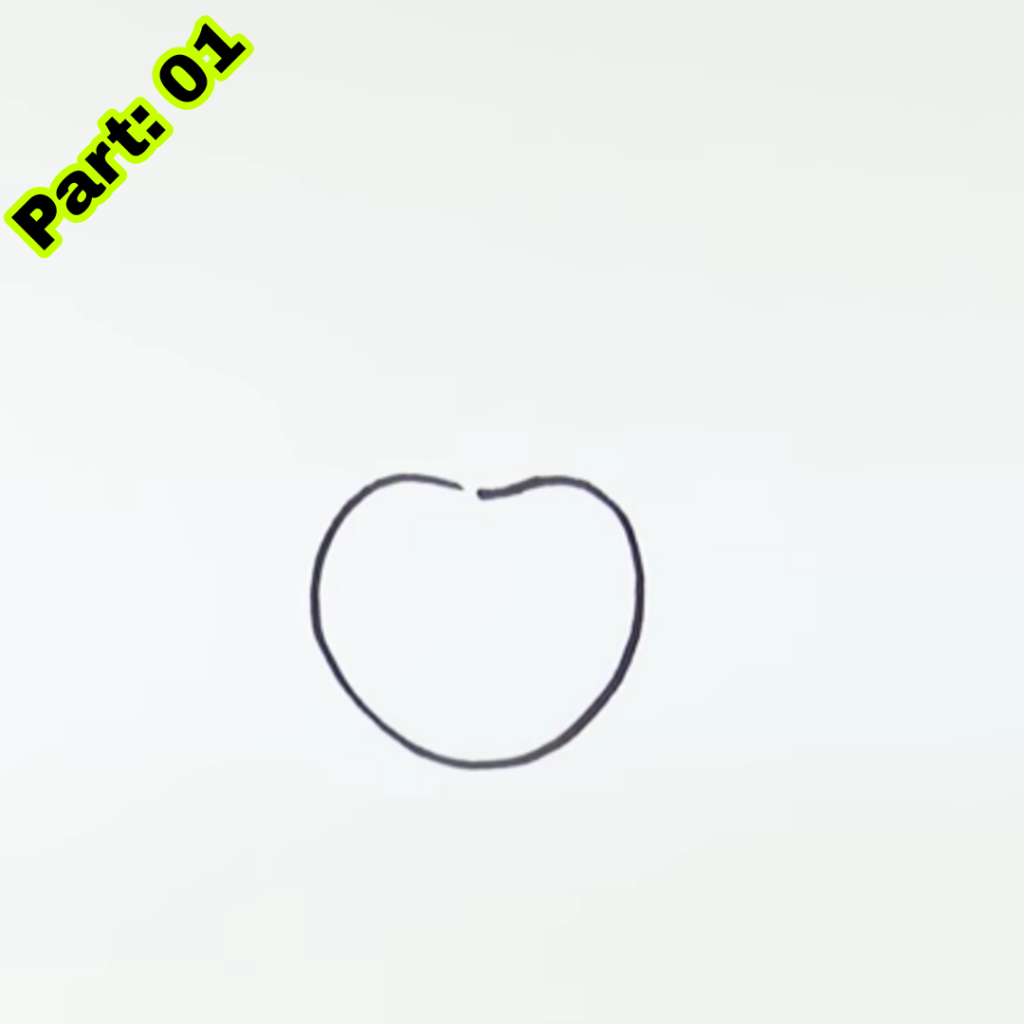
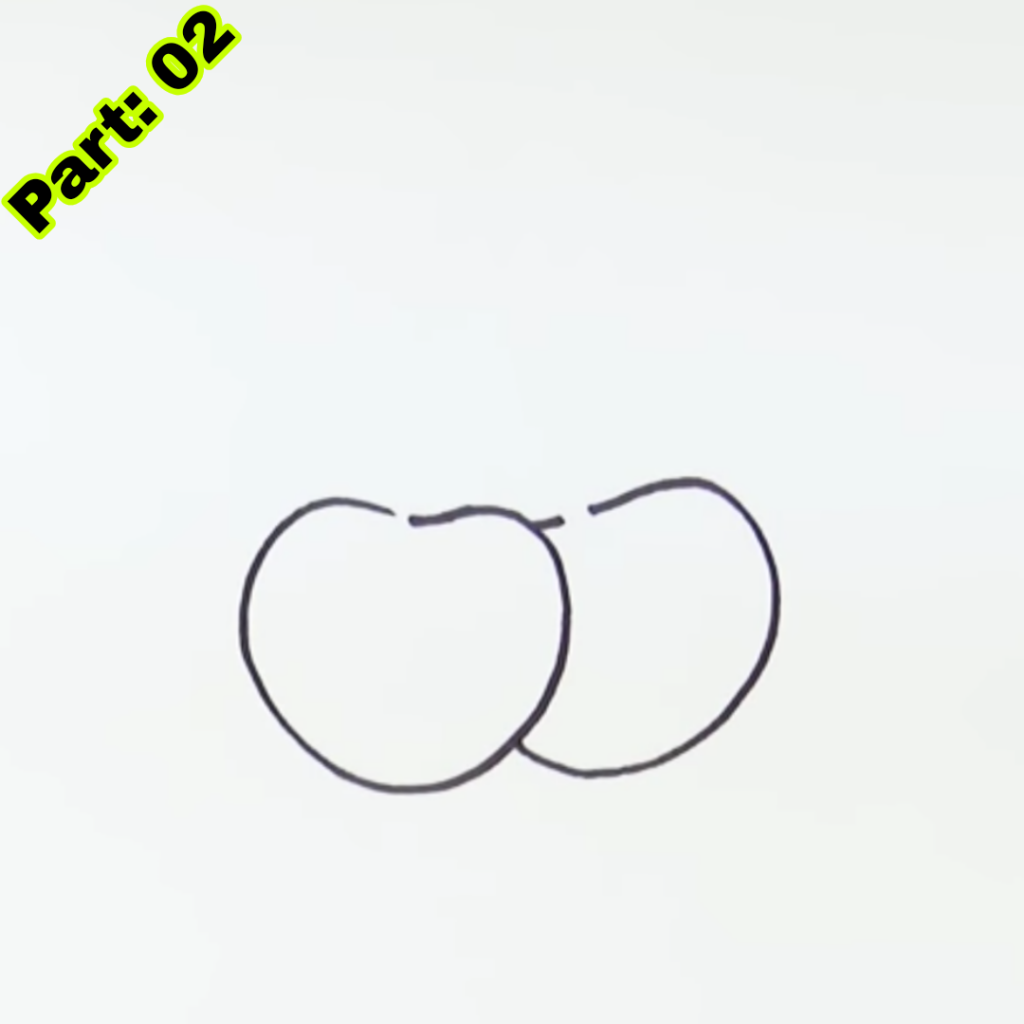
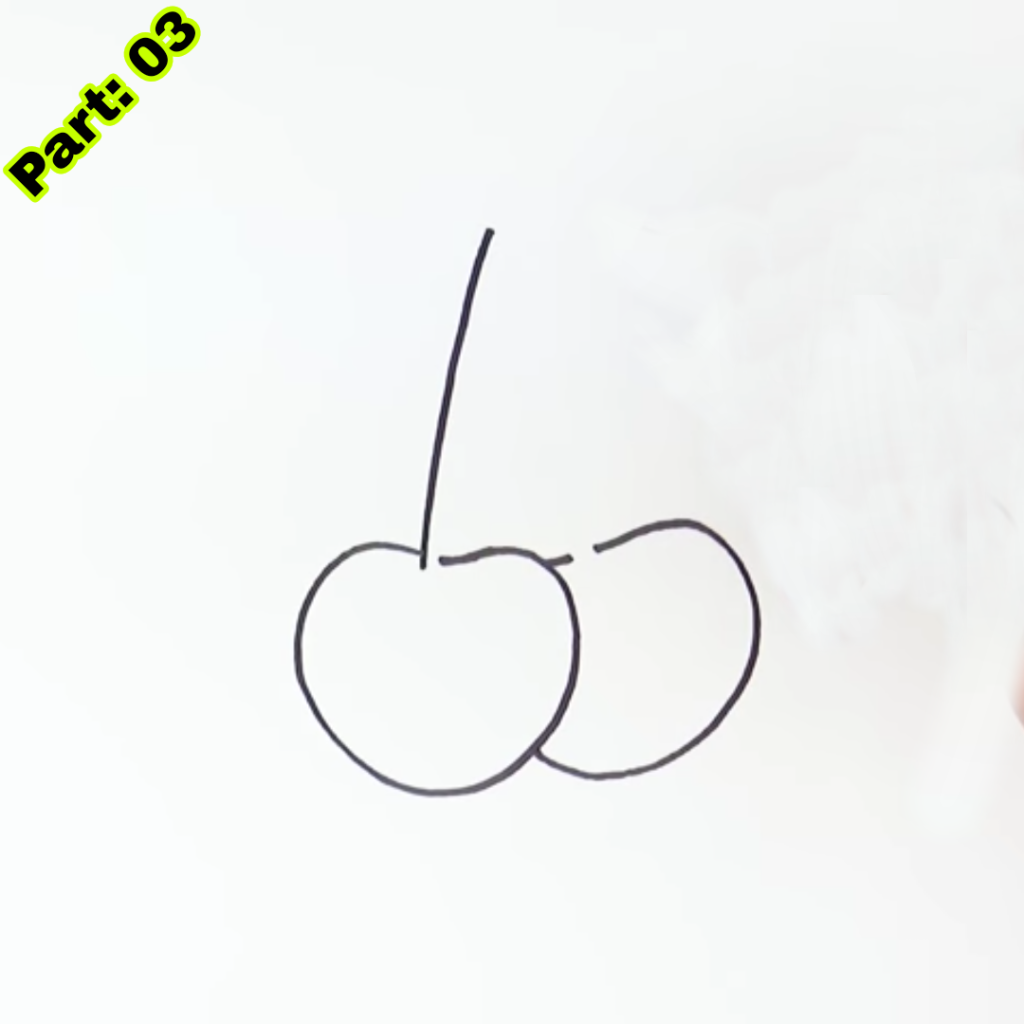
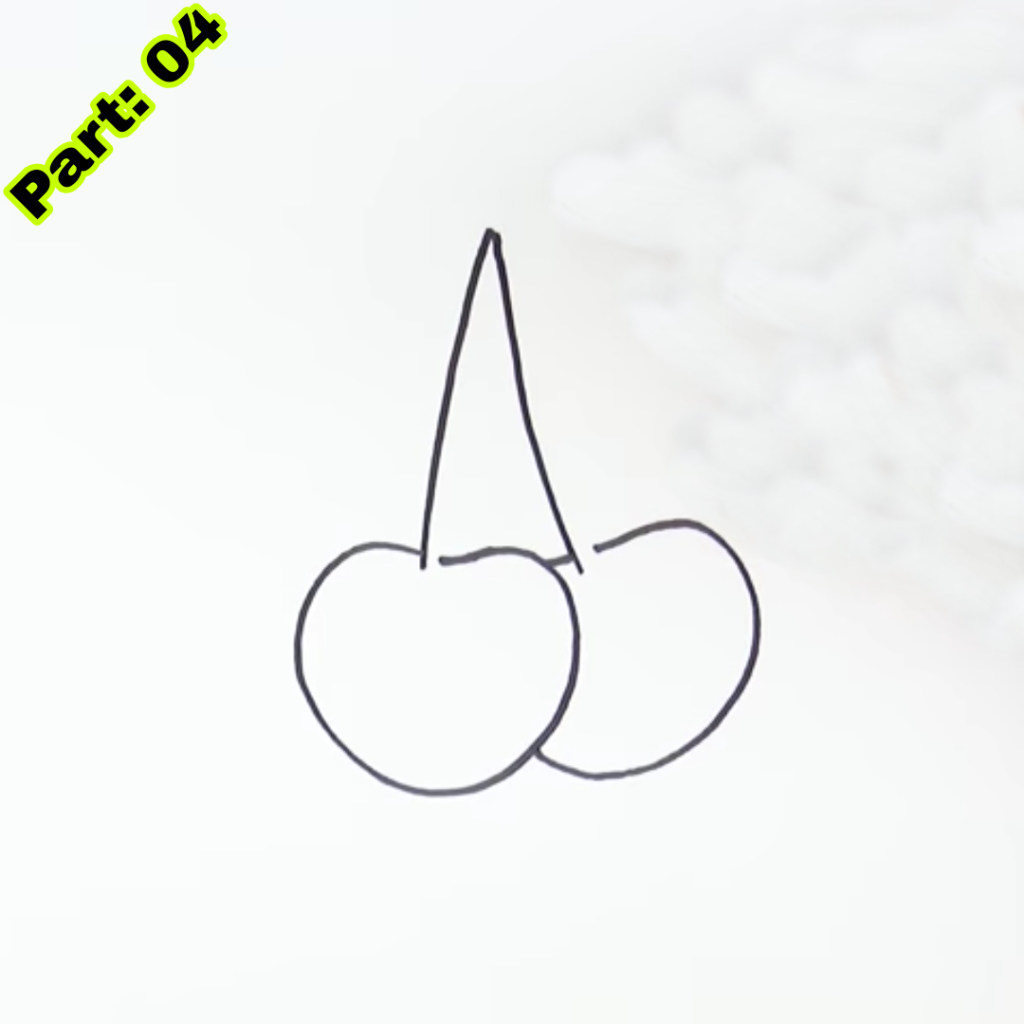
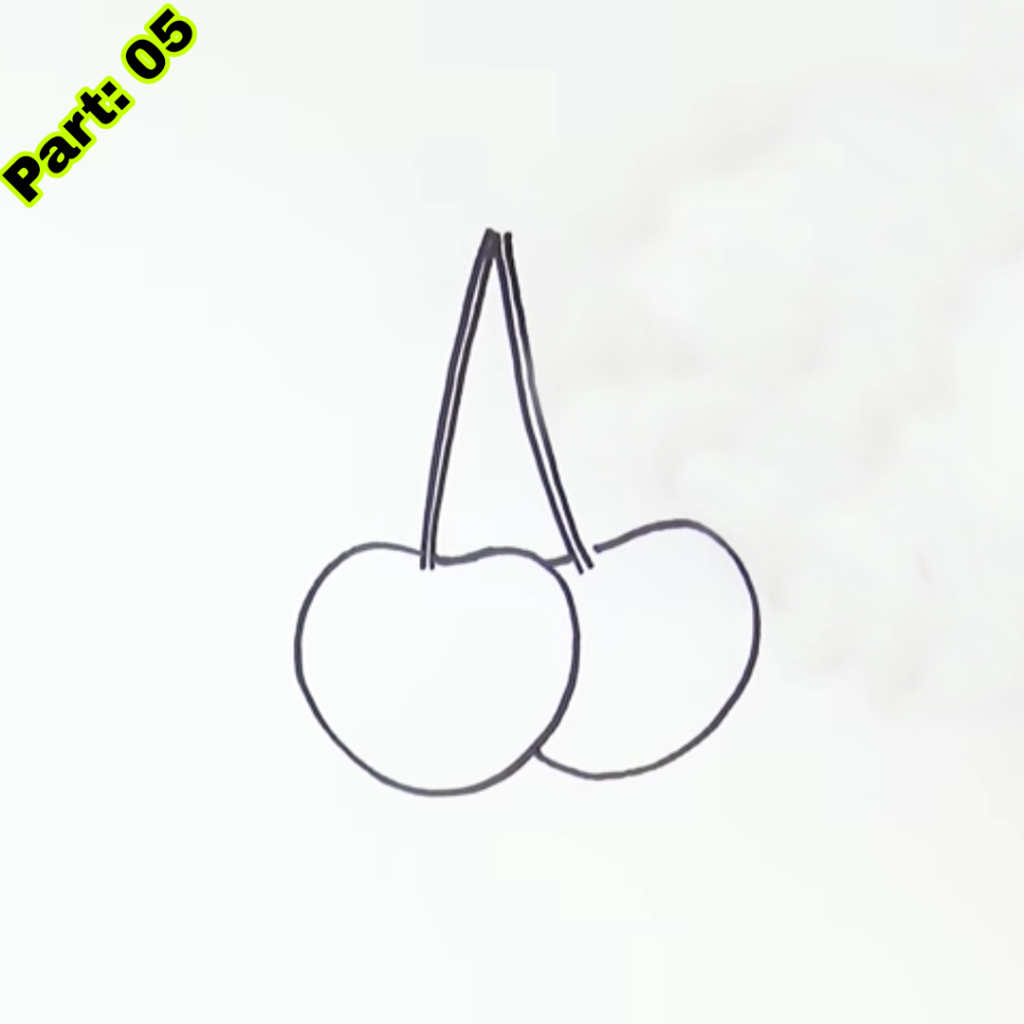
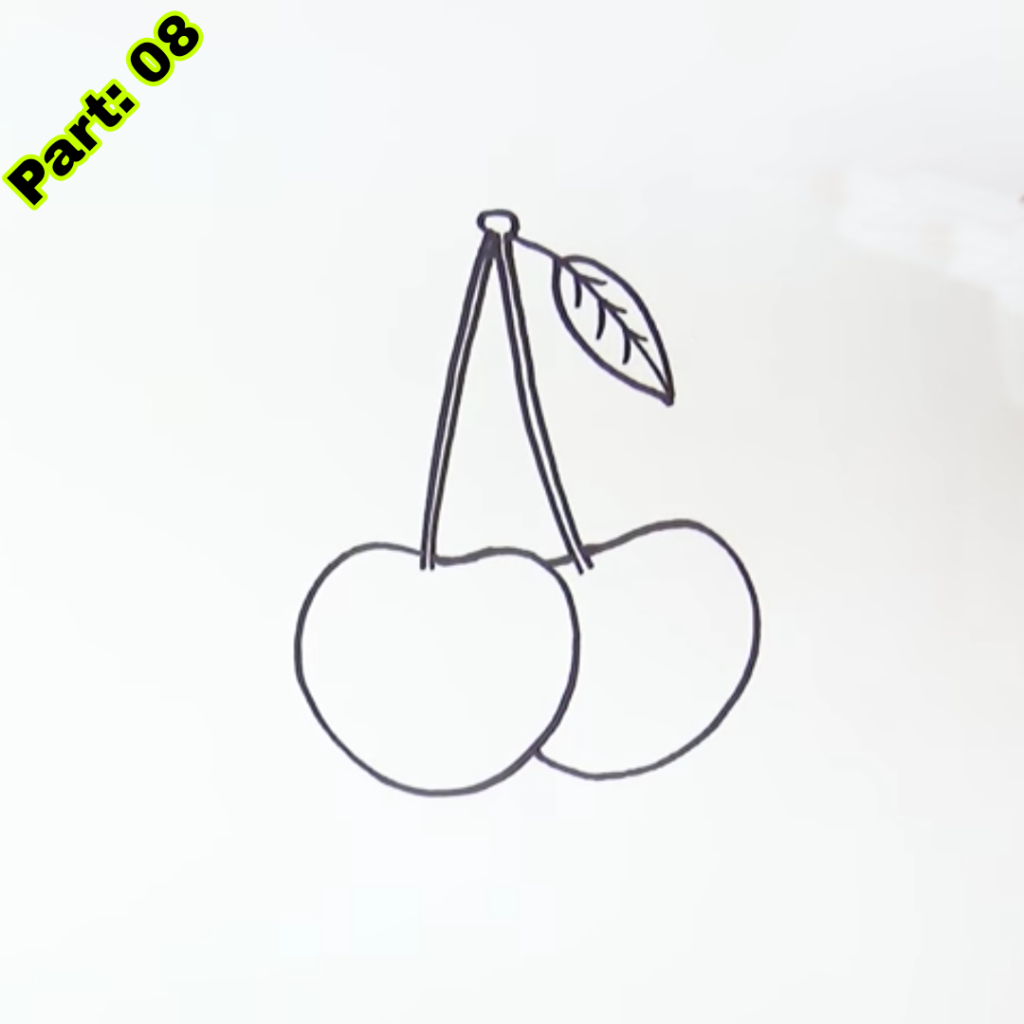
When beginning a cherry drawing, it’s good, to begin with simple forms and progressively work up to more elaborate drawings. Begin by drawing the overall form of the cherry using basic circles or ovals. Then, create the stem and calyx, paying care to their proportions and placement. Once you have the basic forms in place, you can add extra details, such as the skin texture, highlights, and shadows.
Several sketching approaches may be employed to give depth and texture to your cherry sketches. Cross-hatching is a method where lines are drawn in a crisscross manner to generate shade and texture. Stippling is generating texture by utilizing tiny dots or dashes. Both methods may be used to produce realistic skin texture on cherries. Experiment with numerous strategies and discover the ones that work best for you.
Adding Depth and Dimension to Your Cherry Drawing
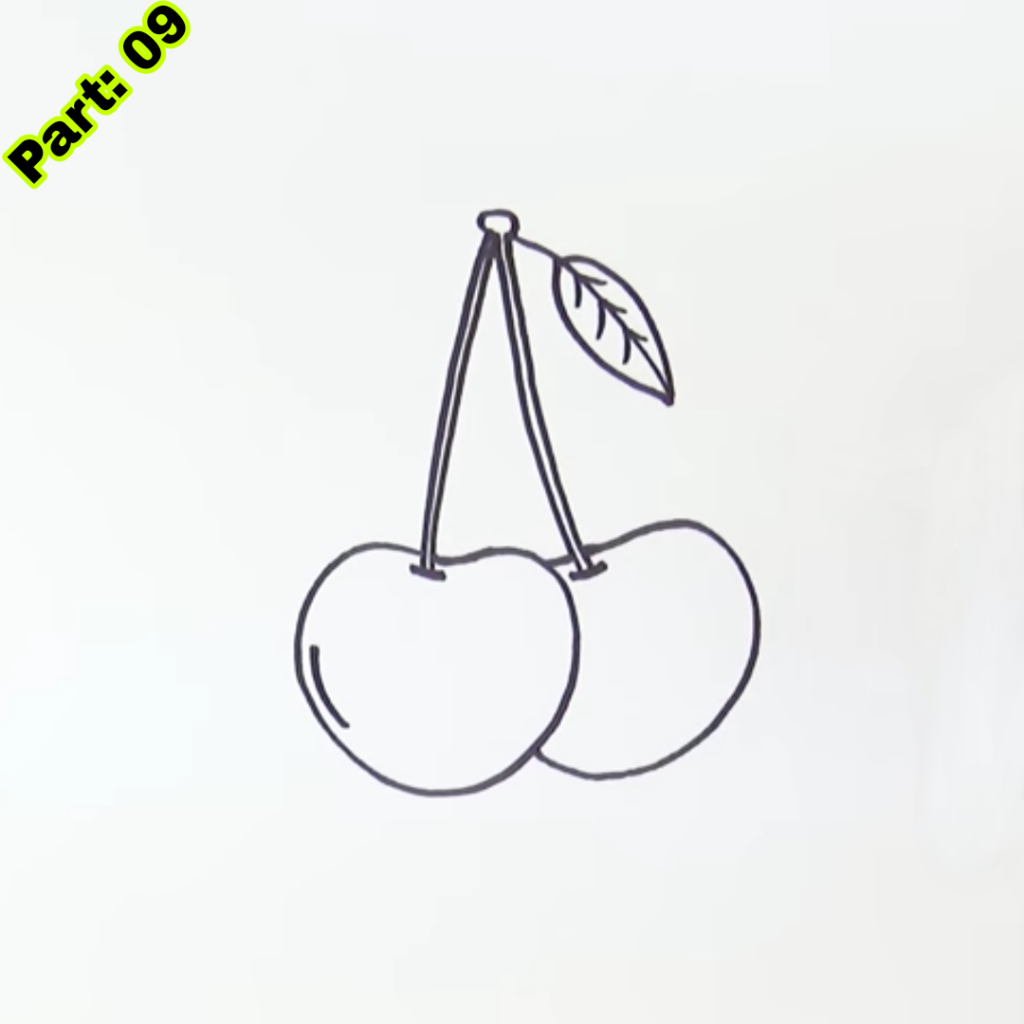
Shading is an important aspect of producing a realistic cherry drawing. It adds depth and perspective to your artwork, making it look three-dimensional. When shading cherries, note how light falls on them and generates highlights and shadows. Use a selection of graphite pencils with varying hardness levels to produce distinct tones. Start softly darkening the regions in shade and progressively deepening the darkness. Use a blending stump or tortillon to blend the graphite and create seamless transitions between bright and dark regions.
In addition to shading, highlights are vital in making a realistic cherry drawing. Notice how light bounces off the skin of the cherry and generates dazzling dots. Use an eraser or a kneaded eraser to lift graphite markings and produce highlights. Be cautious not to overdo it, since too many highlights might make the picture appear unnatural. Finding the proper balance between shade and highlights will give your cherry drawing a three-dimensional aspect.
Choosing the Right Colors for Your Cherry Drawing
If you wish to add color to your cherry drawings, picking hues that appropriately portray the cherry’s look is vital. Observe the hues of cherries intently and observe the minor changes in color and saturation. Reds, purples, and pinks are typically observed in cherries, with deeper colors towards the stem and softer tones towards the bottom. Use colored or watercolor pencils to overlay colors and create a realistic appearance. Start with brighter colors and progressively develop the darkness by stacking various tones.
Blending colors is also vital in generating a realistic image. Use a blending stump or tortillon to mix the colors and produce seamless transitions. Experiment with various blending methods, such as circular movements or back-and-forth strokes, to generate distinct results. Remember to inspect cherries thoroughly and notice their various hues and textures.
Creating a Composition for Your Cherry Drawing
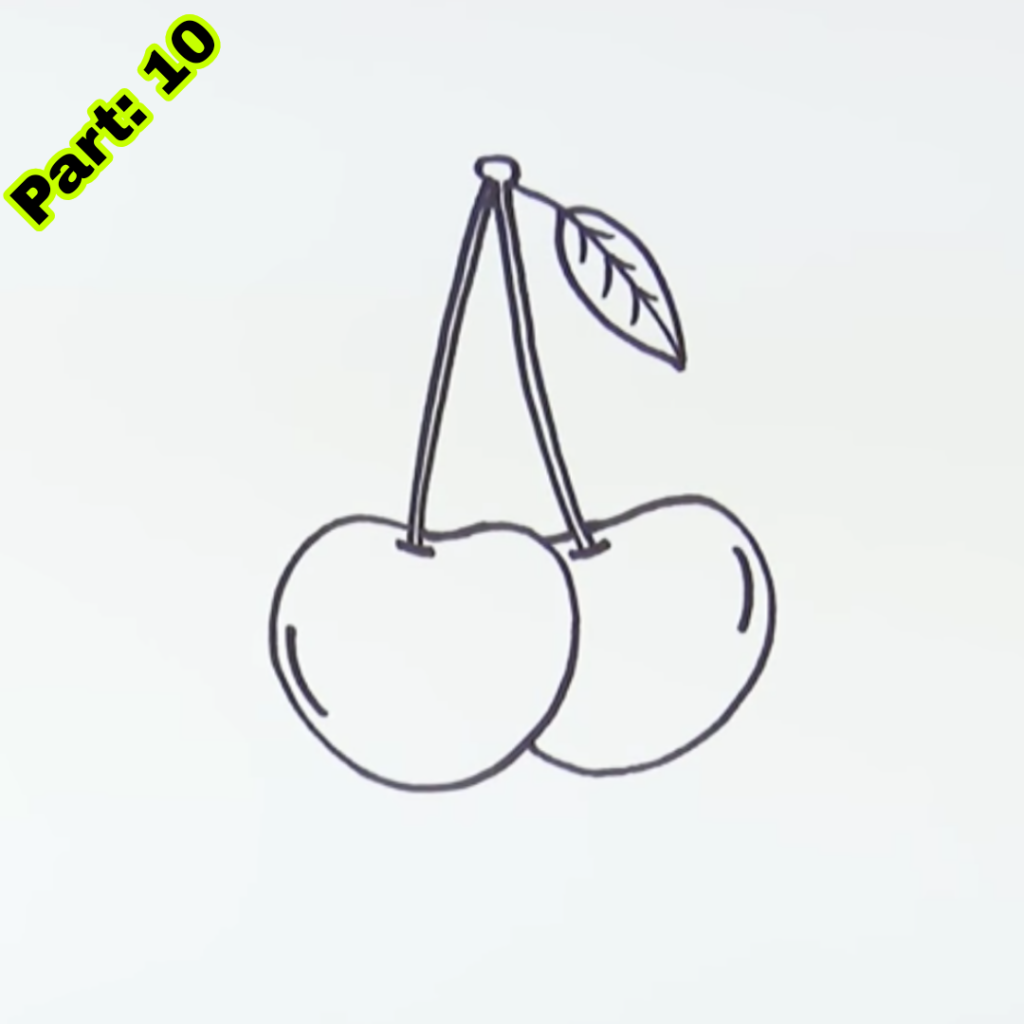
If you want to draw numerous cherries in a composition, it’s vital to consider the placement and balance of the pieces. Start by sketching the basic outlines of the cherry and its stems, paying attention to their arrangement and proportions. Consider the rule of thirds, which proposes dividing your composition into thirds horizontally and vertically and arranging your key pieces along these lines or at their intersections. This may produce a more aesthetically pleasing and balanced arrangement.
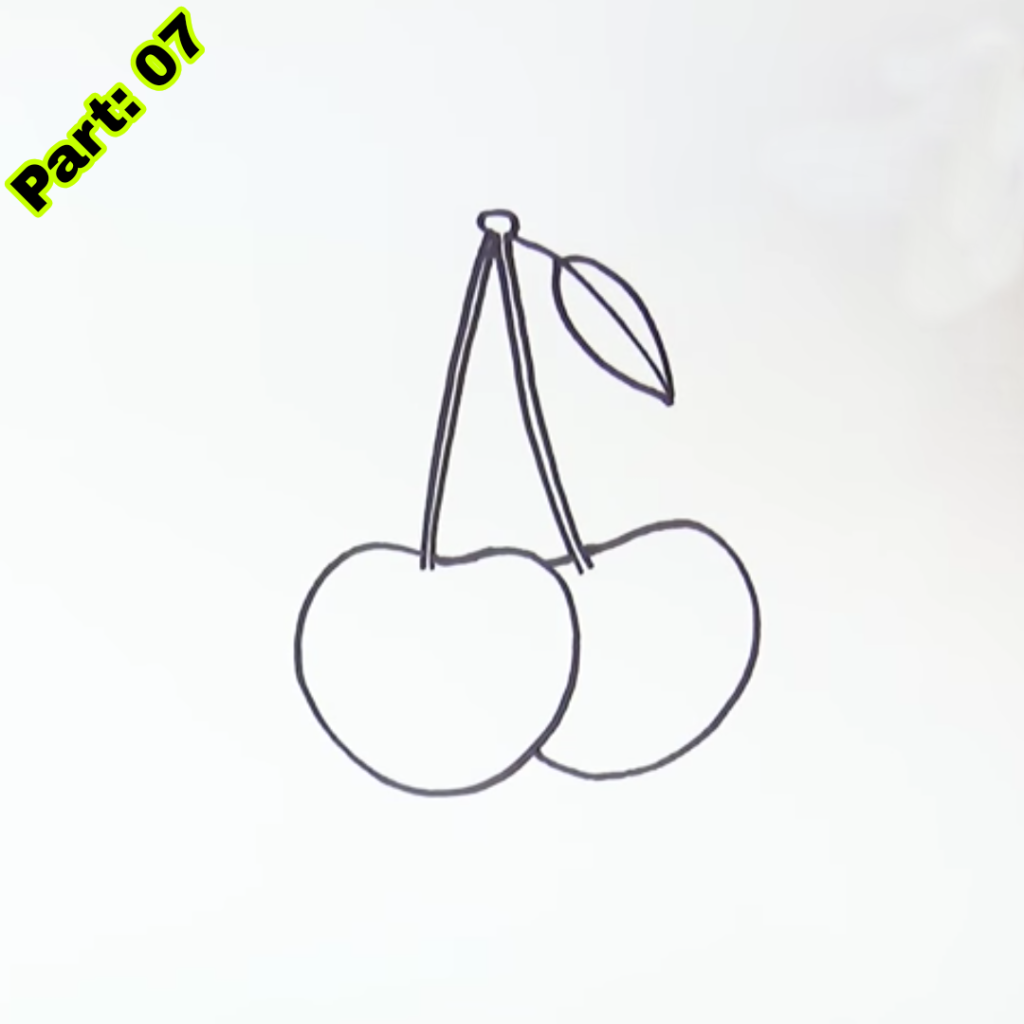
In addition to the cherries, try adding additional parts to your picture, such as leaves or a backdrop. These features may give interest and context to your painting. Experiment with numerous arrangements and compositions to discover the one that works best for your artwork.
Common Mistakes to Avoid in Cherry Drawing
As with any type of painting, novices make frequent blunders in cherry drawing. One typical error is not paying attention to dimensions and perspective. Make careful to inspect cherries attentively and precisely represent their size and form. Another typical error is not utilizing a range of values in shading. Avoid utilizing exclusively bright or dark tones, and try for a balanced range of values to create depth and character in your drawings.
Another error to avoid is overworking your artwork. It’s easy to get caught up in adding too many details or spending too much effort on one area. Remember to stand back and analyze your drawing as a whole. Sometimes, less is more, and leaving certain sections less detailed may make a more fascinating and dynamic artwork.
Experimenting with Different Styles of Cherry Drawing
Cherry sketching may be handled in numerous techniques, based on your tastes and aesthetic ambitions. Realism is a style that strives to show cherries as exactly as possible, capturing every feature and texture. To attain realism, concentrate on examining cherry attentively and precisely reproducing their colors, shapes, and textures.
On the other hand, cartooning is a technique that simplifies and exaggerates the characteristics of cherry for a more fun and whimsical aesthetic. In cartooning, cherries may be given exaggerated emotions or characteristics, providing a sense of personality to the artwork.
Experiment with numerous styles and discover the one that connects with you. Don’t be scared to blend or develop your personal style.
Taking Your Cherry Drawing to the Next Level
If you want to take your cherry sketching talents to the next level, various advanced methods and tools will help you develop. Life drawing workshops or reference images may provide you many sources to draw from and help you develop your observation abilities. Online tutorials and courses may also give helpful information and teaching.
Practice is crucial to enhancing your cherry sketching abilities. Set aside regular time for sketching and push yourself with new compositions or techniques. Don’t be scared to make errors and learn from them. The more you practice, the more confident and skillful you will become.
Conclusion
Drawing cherries may be a profitable and pleasurable experience for novices. By understanding the anatomy of a cherry, practicing sketching techniques, adding depth and dimension through shading, choosing the right colors, creating a balanced composition, avoiding common mistakes, experimenting with different styles, and taking your skills to the next level, you can improve your cherry drawing skills and create stunning artwork. Remember to have fun, be patient with yourself, and continue practicing and experimenting with your cherry sketching abilities.
Sponsored By
Check out the best and most affordable digital marketing services that can take your business to the next level. If you want to build a Blogging Business, Please contact them; They Basically provide from-scratch-to-finish services https://elonmusktrillion.com/
FAQ
What are some crucial suggestions for beginners trying to draw cherries?
This FAQ addresses typical inquiries regarding essential approaches and suggestions to assist individuals new to cherry sketching enhance their abilities.
Are there certain equipment and materials advised for cherry drawing?
This FAQ includes insights into the many sorts of pencils, papers, and other materials that might increase the quality of your cherry drawings.
How can I effectively depict the texture and sparkle of cherry in my drawings?
This FAQ tackles ways and tactics to successfully capture cherry’ glossy and textured appearance, making your paintings seem realistic and attractive.
What shading methods work best for generating depth and dimension in cherry drawings?
Here, readers can discover information regarding shading techniques that bring out the three-dimensional qualities of cherry, making them pop out on paper.
Are there suggested workouts or practice regimens to enhance cherry sketching skills?
This FAQ offers workouts and practice routines suited to developing your cherry sketching talents, delivering a disciplined approach to skill development.
Bonus:
You may check out our most helpful article about how you can help your child to do extremely well in drawing https://bloggchain.com/easy-simple-pumpkin-drawing-for-kids/
