Introduction
Airplane Drawing is a crucial exercise for youngsters as it helps them develop their creativity, imagination, and fine motor skills. It helps them to express themselves and explore their thoughts graphically. One enjoyable and thrilling drawing project for youngsters is sketching aircraft. Airplanes are amazing devices that attract the imagination of youngsters. Removing aircraft enables youngsters to construct something aesthetically pleasing and helps them understand about the many elements of an airplane and how they operate together.
Materials Required for Airplane Drawing
To start sketching an aircraft, you will need a few basic materials. These include:
- 1. Paper: Choose a blank piece of paper suited for drawing. A standard-size piece, such as A4 or letter size, will work nicely.
- 2. Pencil: A pencil is needed for sketching and outlining your aircraft design. Choose a pencil with a medium hardness, such as an HB or 2B, which will enable you to produce light and dark lines.
- 3. Eraser: An eraser is required for fixing errors or modifying your artwork. Choose a gentle eraser that won’t harm the paper.
- 4. Ruler: A ruler may assist draw straight lines and guarantee that your aircraft is proportional.
- 5. Coloring supplies: If you desire to color your aircraft picture, you will need coloring tools such as colored pencils, markers, or crayons.
Gift
Claim our premium worksheet practice book For Free (Only for you):

Step-by-Step Guide to Drawing an Airplane
Now, let’s dig into the step-by-step process of sketching an aircraft. Follow these directions and refer to the visual aids supplied to produce your own aircraft sketch in just a few minutes.
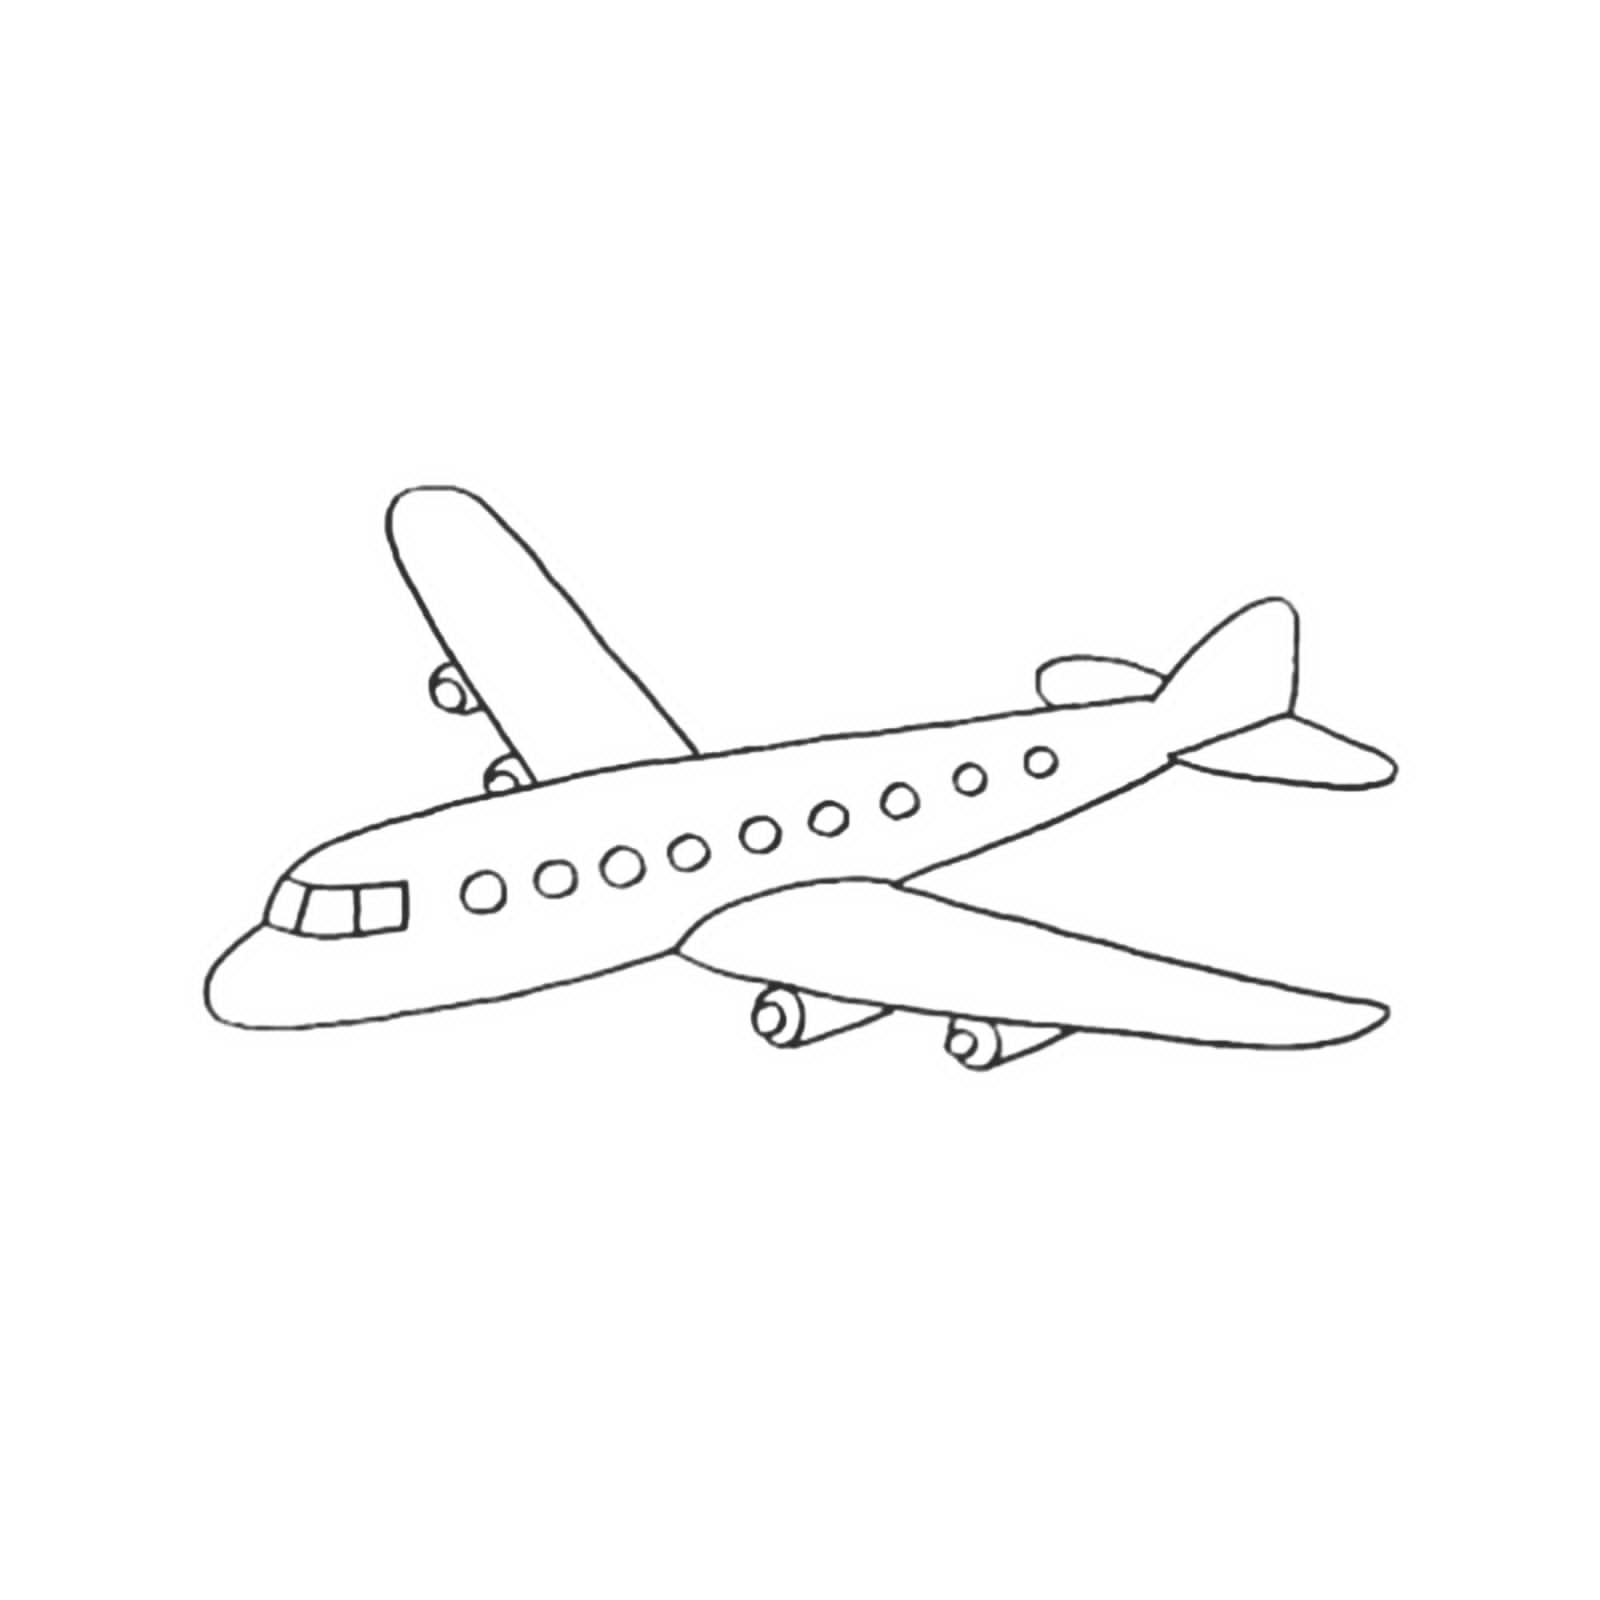
- 1. Start by drawing a horizontal line towards the top of your page. This line will function as the horizon line.
- 2. Draw a tiny circle at the left side of the horizon line. This circle will represent the cockpit of the aircraft.
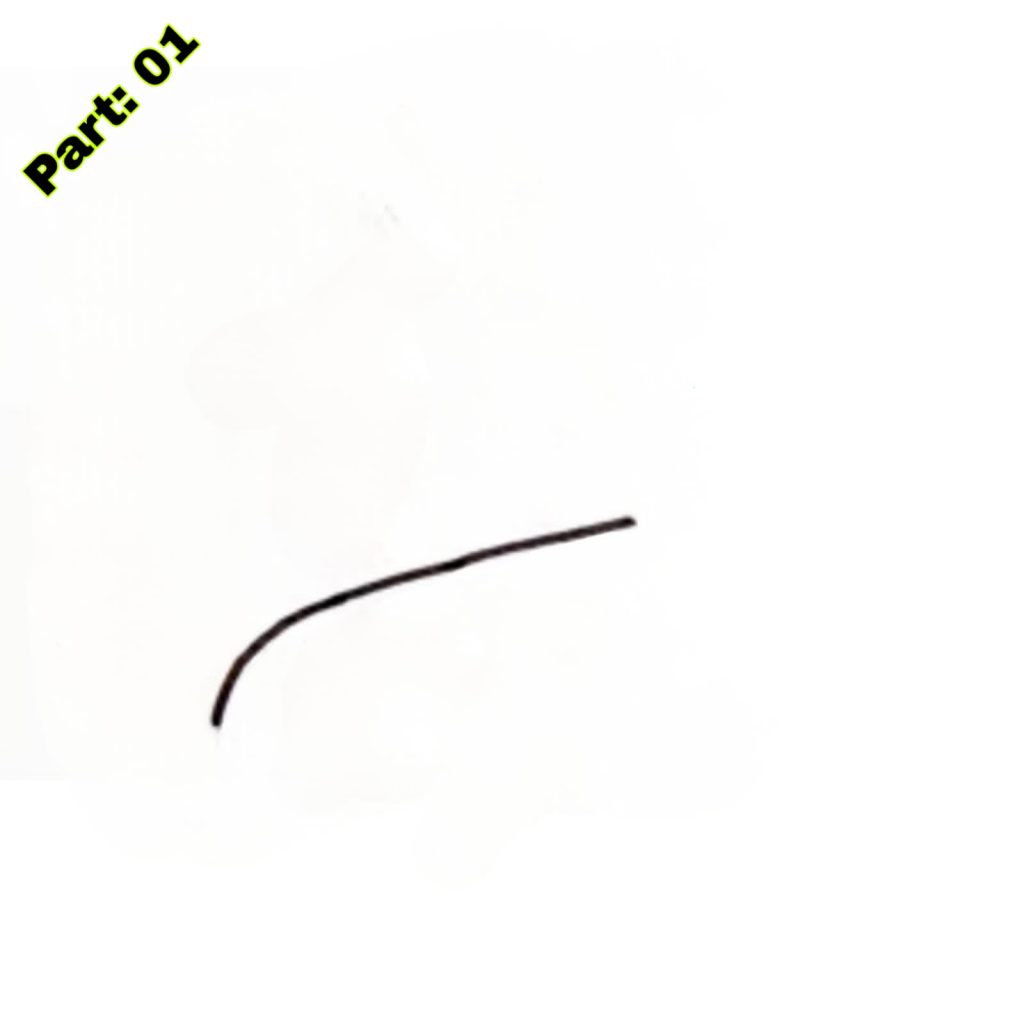
- 3. Draw a slightly curved line running downwards from the bottom of the circle. This line will represent the front portion of the airplane’s fuselage.
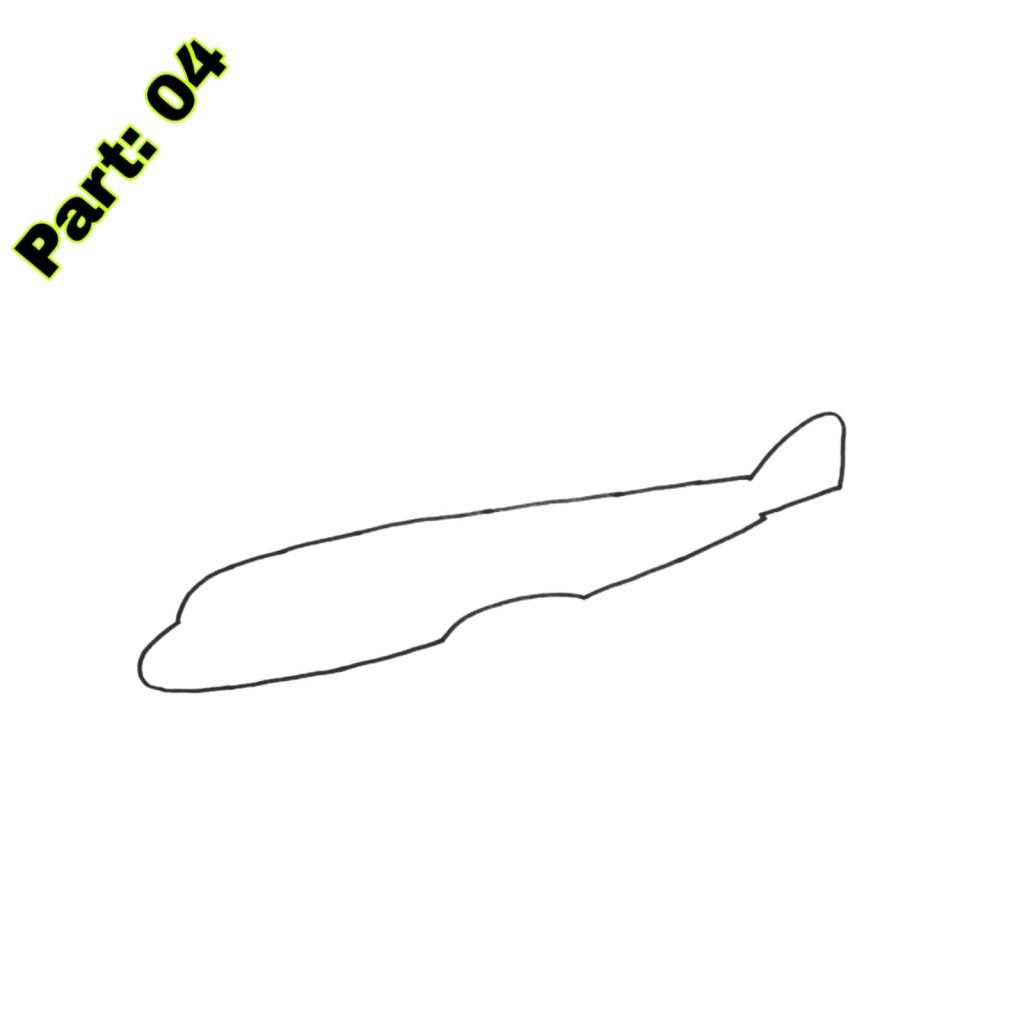
- 4. Draw another curved line beginning from the bottom of the previous line and continuing downwards. This line will represent the bottom half of the fuselage.
- 5. Connect the two lines at the end to finish the form of the fuselage.
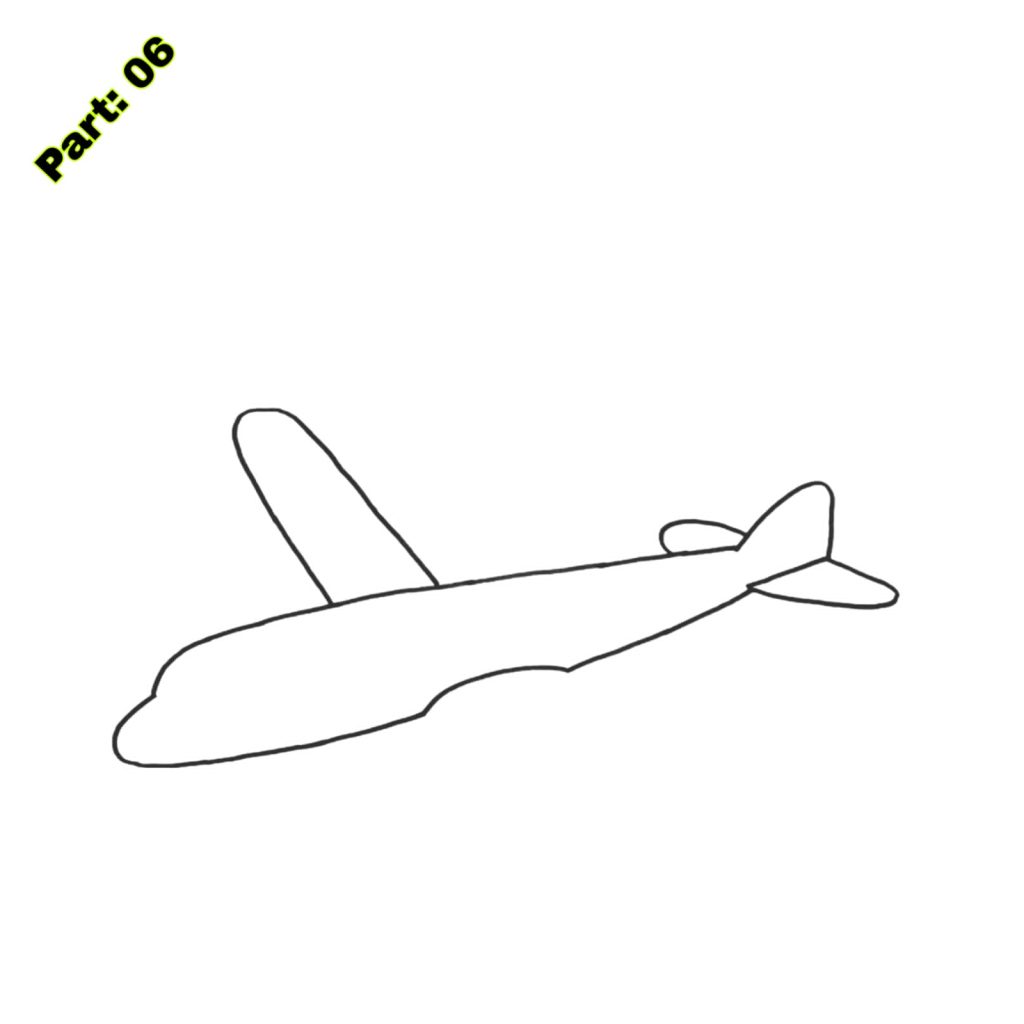
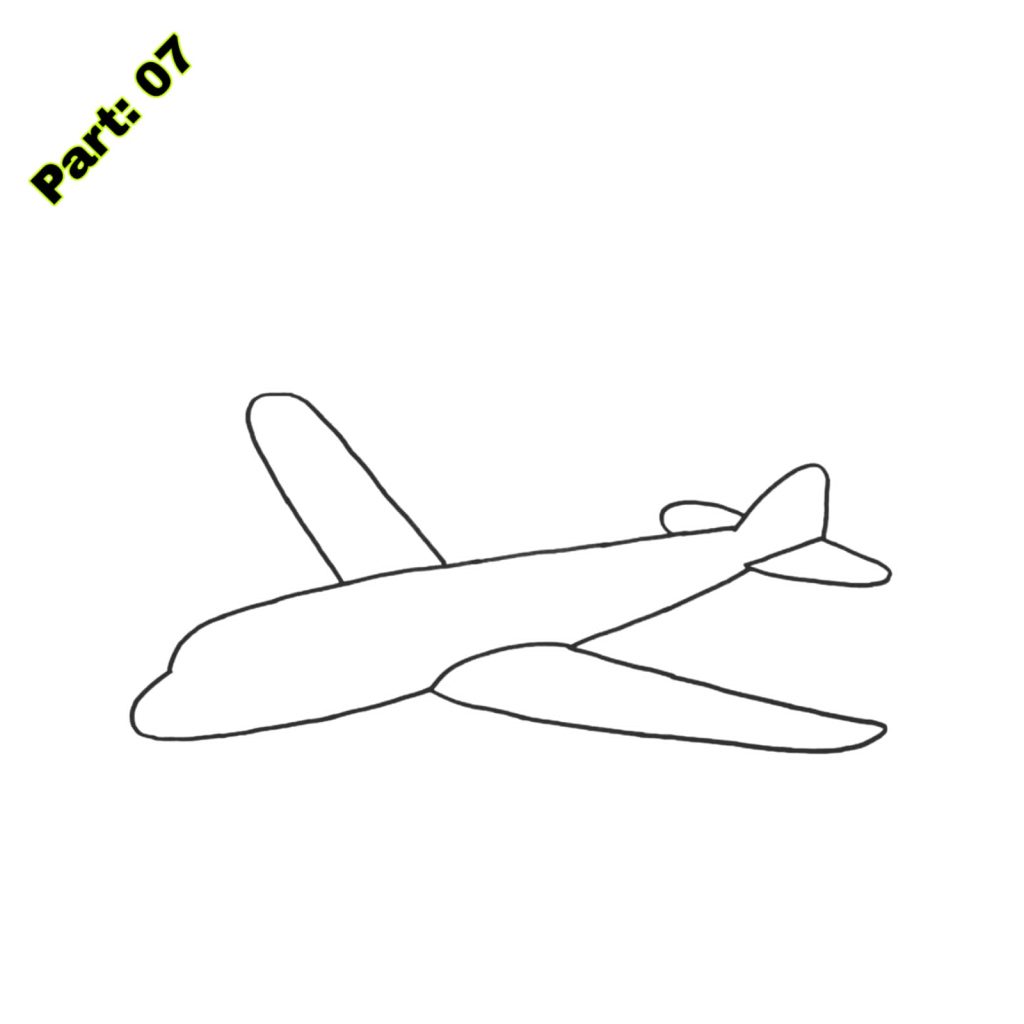
- 6. Draw two tiny rectangles on each side of the fuselage at the front. These will be the wings of the aircraft.
- 7. Add a vertical line in the centre of each wing to depict the wing flaps.
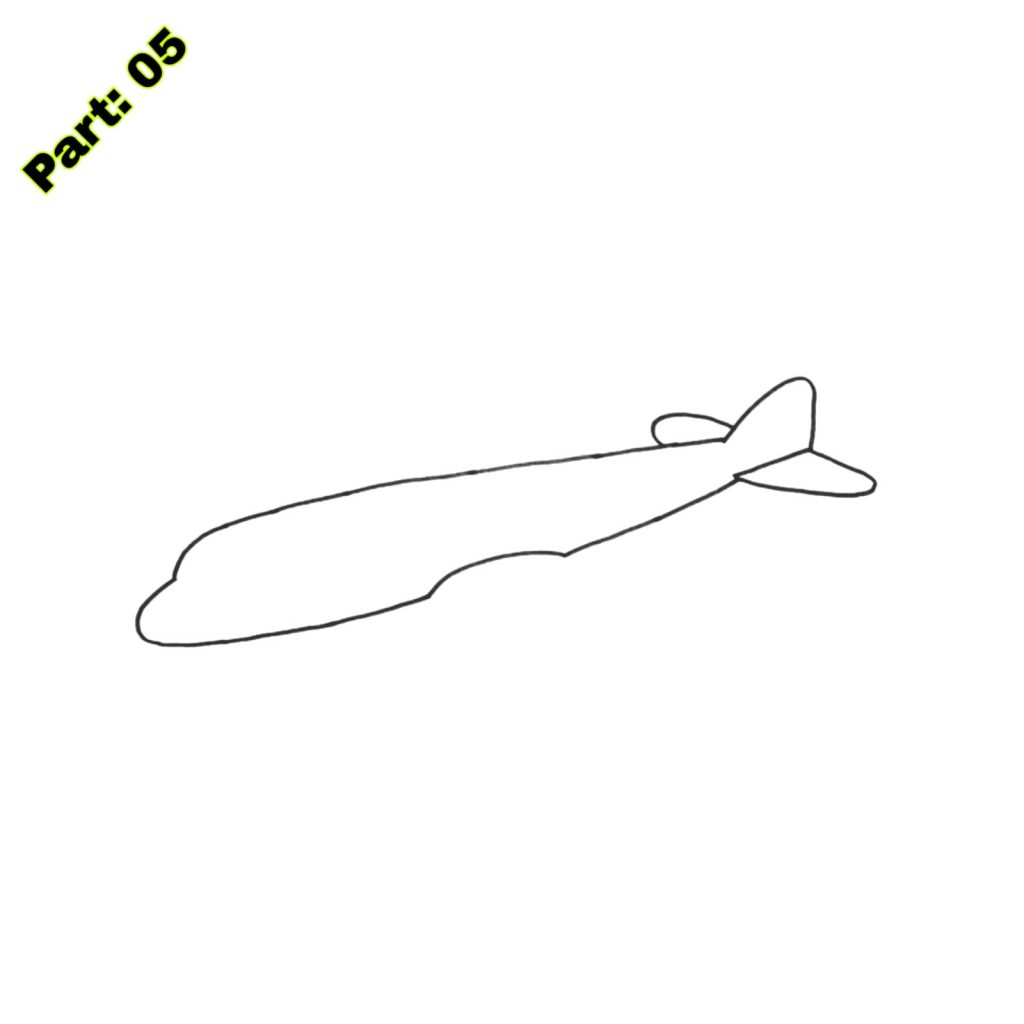
- 8. Draw a tiny rectangle at the rear of the fuselage. This will be the tail of the aircraft.
- 9. Add a vertical line in the center of the tail to depict the tail fin.
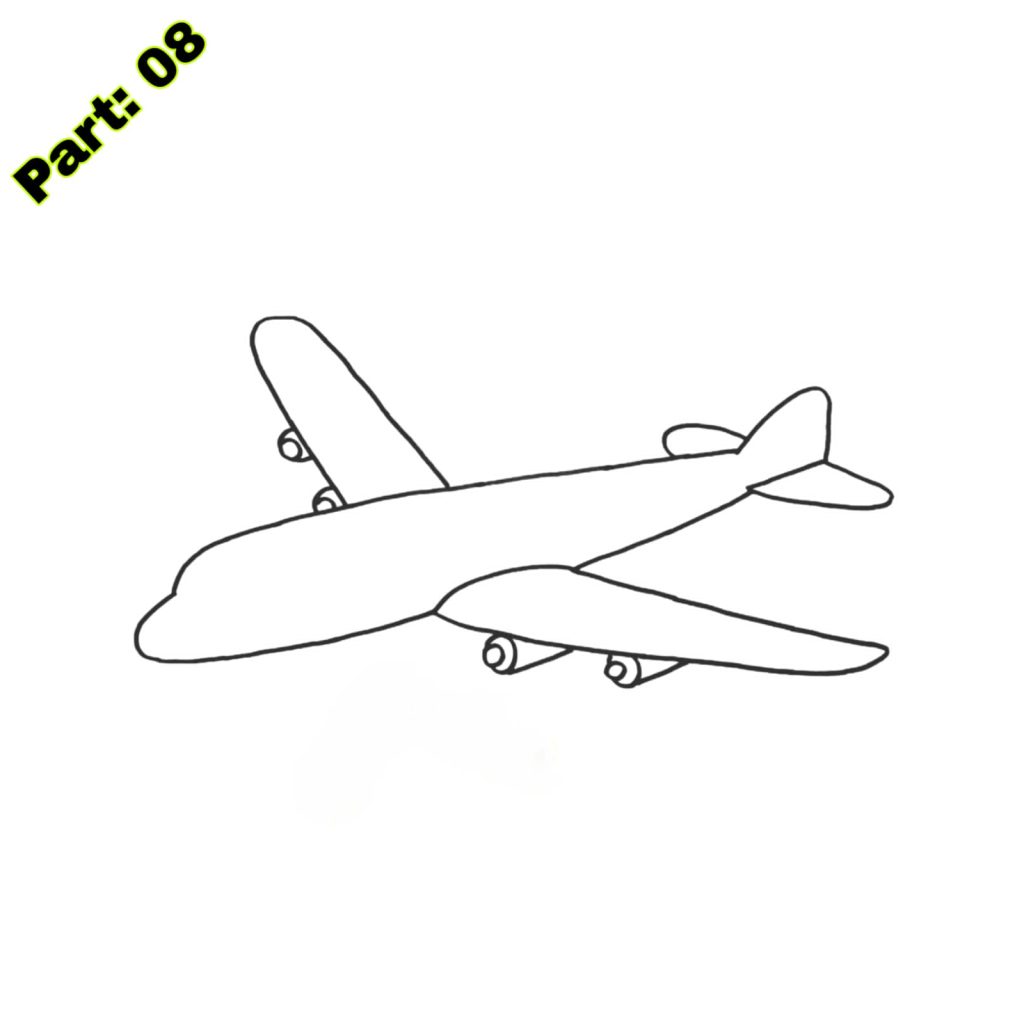
- 10. Draw two little circles at the rear of the fuselage. These will be the engines of the aircraft.
- 11. Add a curved line linking each engine to the fuselage to finish the engines.
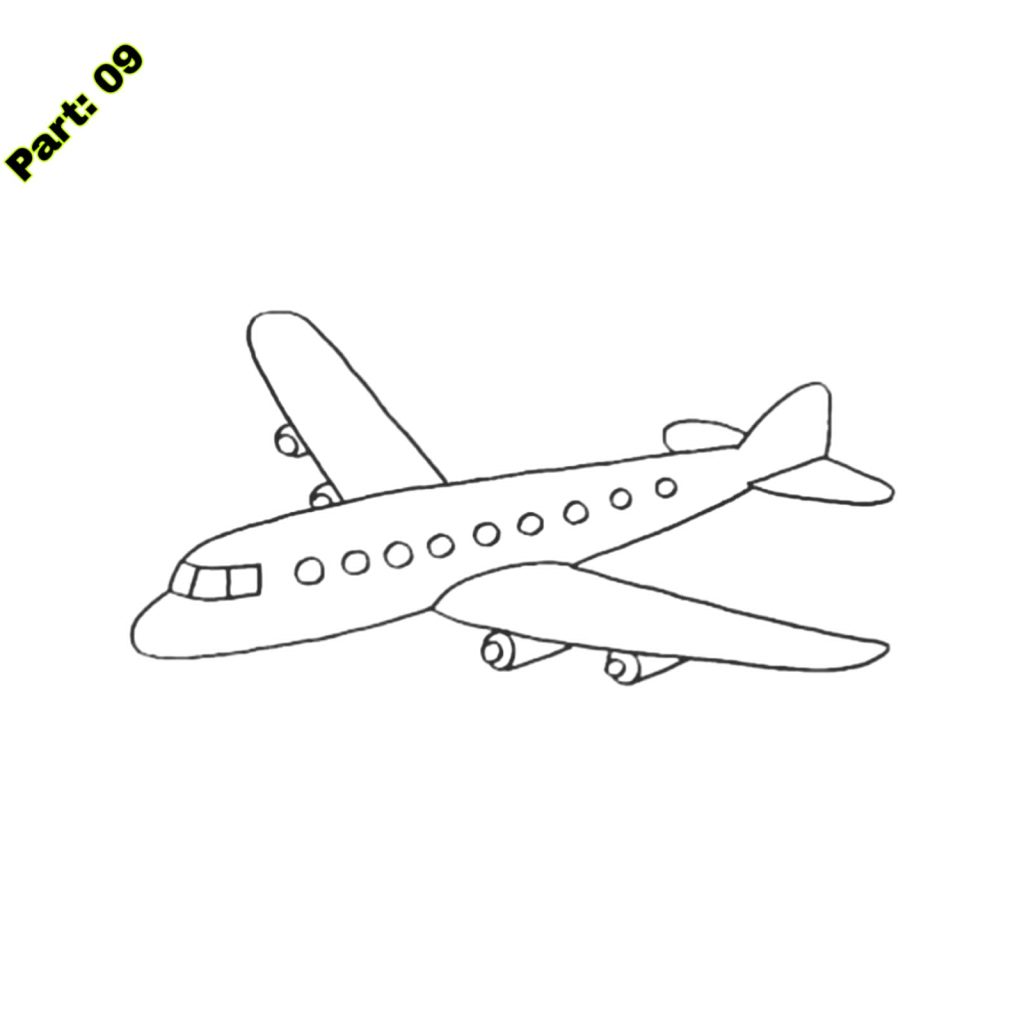
- 12. Erase any extraneous lines and add whatever embellishments you wish, such as windows, wheels, or propellers.

Tips for Making Your Airplane Drawing Look Realistic
To make your aircraft drawing appear more realistic, there are a few suggestions you may follow:
- 1. Add depth and dimension: Use shading methods to create depth and dimension in your drawing. Shade darker places where shadows naturally fall, such as beneath the wings or behind the engines.
- 2. Use highlights: Add highlights to particular drawing regions to make them look glossy or reflective. This may be done by leaving little portions vacant or using a white colored pencil or marker.
- 3. Pay attention to proportions: Make sure that all sections of your aircraft are proportional to each other. Use a ruler if required to guarantee straight lines and exact measurements.
- 4. Study reference images: Look at aircraft photographs to better comprehend their forms, features, and dimensions. This will help you make your drawing more precise and lifelike.
Adding Details to Your Airplane Drawing
Adding features to your aircraft painting will make it more thrilling and customized. Here are some possibilities for adding details:
- 1. Windows: Draw tiny rectangles or ovals along the fuselage to indicate windows. You may also apply shading or reflections to make them appear more realistic.
- 2. Wheels: Draw circles or ellipses beneath the fuselage to indicate the airplane’s wheels. Add spokes or shading to make them seem three-dimensional.
- 3. Propellers: Draw curving lines or blades at the front of the engines to depict the propellers. Add shading or accents to make them appear like they are spinning.
- 4. Logos or markings: Add logos or markings to the fuselage or wings of the aircraft to make it appear more realistic. You may utilize reference photos or build your own designs.
Remember, these things are optional; you may add as many or as few as you wish. Get creative and make your aircraft drawing unique!
Coloring Your Airplane Drawing
Once you have completed designing your aircraft, you may color it using different coloring tools such as colored pencils, markers, or crayons. Here are some tips for coloring your aircraft drawing:
- 1. Choose acceptable colors: Look at reference photographs or use your creativity to decide on the colors for your aircraft. Consider the colors generally used for aircraft, such as hues of blue, gray, or white for the body and metallic colors for the engines and other metallic elements.
- 2. Color theory: Learn about color theory and how various colors interact together. Consider utilizing complimentary colors (colors opposite each other on the color wheel) to generate contrast and make particular portions of your design stand out.
- 3. Experiment with shading: Use tones of the same hue to create shading and highlights in your drawing. This will give depth and make your image appear more realistic.
- 4. Have fun with patterns: If you want to make your aircraft drawing more distinctive, try adding patterns or motifs to the wings or tail. This may be done using various colors or patterns, such as stripes or dots.
Remember to take your time and enjoy the coloring process. Coloring may be a calming and fun pastime that helps you to bring your design to life.
Common Mistakes to Avoid While Drawing an Airplane
While drawing an aircraft, students may make several frequent blunders. Here are a few pitfalls to avoid and methods to enhance your sketching skills:
- 1. Uneven proportions: Pay attention to the proportions of various aircraft elements. Use a ruler if required to guarantee straight lines and exact measurements.
- 2. Messy lines: Practice producing smooth and crisp lines. Use mild pressure while drawing and progressively deepen the lines as you go.
- 3. Lack of details: Adding details may make your drawing more intriguing and realistic. Take your time to include windows, wheels, and other little features that will enrich your design.
- 4. Incorrect perspective: Understand the notion of perspective and how it pertains to sketching aircraft. The elements of the airplane nearest to you should look more prominent, while the features further away should appear more tiny.
By being aware of these typical faults and practicing often, you may improve your drawing abilities and produce more accurate and aesthetically attractive aircraft drawings.
Fun Facts About Airplanes to Share with Kids
To make the aircraft sketching practice more instructive and entertaining, here are some fascinating facts about airplanes that youngsters will love learning:
- 1. The Wright brothers, Orville and Wilbur, are credited with conceiving and manufacturing the world’s first successful aircraft in 1903.
- 2. The highest recorded speed of an aircraft is 2,193.2 miles per hour (3,529.6 kilometers per hour), achieved by the NASA X-43 in 2004.
- 3. The biggest aircraft in the world is the Airbus A380, which can transport up to 853 people.
- 4. Airplanes include black boxes, also known as flight data recorders, which store critical information about a flight, such as altitude, speed, and discussions in the cockpit.
- 5. An airplane’s wings are intended to provide lift, enabling the aircraft to remain in the air. They are curved on the top and flat on the bottom to provide a pressure differential that generates lift.
Incorporate these amusing facts into your aviation sketching project by discussing them with your kids or incorporating them as comments or labels in your design. This will make the training more instructive and generate curiosity and enthusiasm in flying.
Other Airplane Drawing Ideas for Kids
Drawing aircraft may be a starting point for various drawing hobbies and projects. Here are some great aircraft sketching ideas for kids:
- 1. Create a fleet of airplanes: Draw many aircraft of varying sizes and shapes. Arrange them on a huge piece of paper to make a fleet or airshow scenario.
- 2. construct your own airplane: Encourage youngsters to utilize their creativity and construct unique aircraft. They may experiment with various designs, colors, and features to construct their own airplane.
- 3. Draw an airport scene: Expand the drawing practice by constructing a whole set. Draw runways, control towers, hangars, and other airport facilities. Add aircraft flying off and landing to bring the scene to life.
- 4. Make a comic strip: Use your aircraft designs to make a comic strip or tale. Kids may design several panels displaying aircraft in various scenarios or experiences.
These extra drawing ideas will help students to develop their creativity and imagination further while improving on their basic aircraft sketching abilities.
Conclusion
Drawing aircraft is a fun and creative hobby for youngsters with several advantages. It helps enhance their fine motor abilities, creativity, and imagination. Following the step-by-step tutorial and applying the hints and recommendations offered, youngsters may make distinctive and aesthetically attractive aircraft drawings.
Encourage youngsters to continue developing their creativity via sketching and other creative activities. Drawing aircraft may be a beginning point for further investigation of aviation, engineering, and design. It may motivate youngsters to learn more about aircraft and the mechanics of flying while cultivating their passion for art and creativity. So take your stuff and start creating your own beautiful aircraft now!
Sponsored By
Check out the best and most affordable digital marketing services that can take your business to the next level. If you want to build a Blogging Business, Please contact them; They Basically provide from-scratch-to-finish services https://elonmusktrillion.com/
FAQ
Q1: As described in the post, how can I draw an aircraft in only 3 minutes?
A1: The study includes step-by-step directions and ideas for removing an airplane swiftly and efficiently within a 3-minute period, making it accessible for youngsters.
Q2: What materials do I need to follow the aircraft sketching lesson in the article?
A2: The article may list the essential tools, such as paper, pencils, erasers, and possibly some colored markers or crayons, to lend a creative touch to the drawing.
Q3: Do I need previous drawing expertise to finish the aircraft sketching activity?
A3: Previous sketching experience is only occasionally essential. The guide is built with kids in mind, giving easy and clear instructions that even novices may follow to make a recognized aircraft drawing.
Q4: Are there any particular age suggestions for youngsters to try the aircraft drawing?
A4: The article could include age guidelines, but typically, the lesson should be acceptable for a broad variety of ages, from smaller children with rudimentary motor skills to somewhat older youngsters interested in developing their drawing talents.
Q5: Can I customize the aircraft sketching instruction to meet my creative style or preferences?
A5: Absolutely! The article’s instruction offers a basis, but you’re invited to add your personality to the drawing. Feel free to play with colors, shapes, and extra aspects to create the aircraft uniquely yours.
Bonus:
You may check out our most helpful article about how you can help your child to do extremely well in drawing https://bloggchain.com/easy-nike-shoe-drawing-for-kids-in-under-4-minutes/
