Introduction
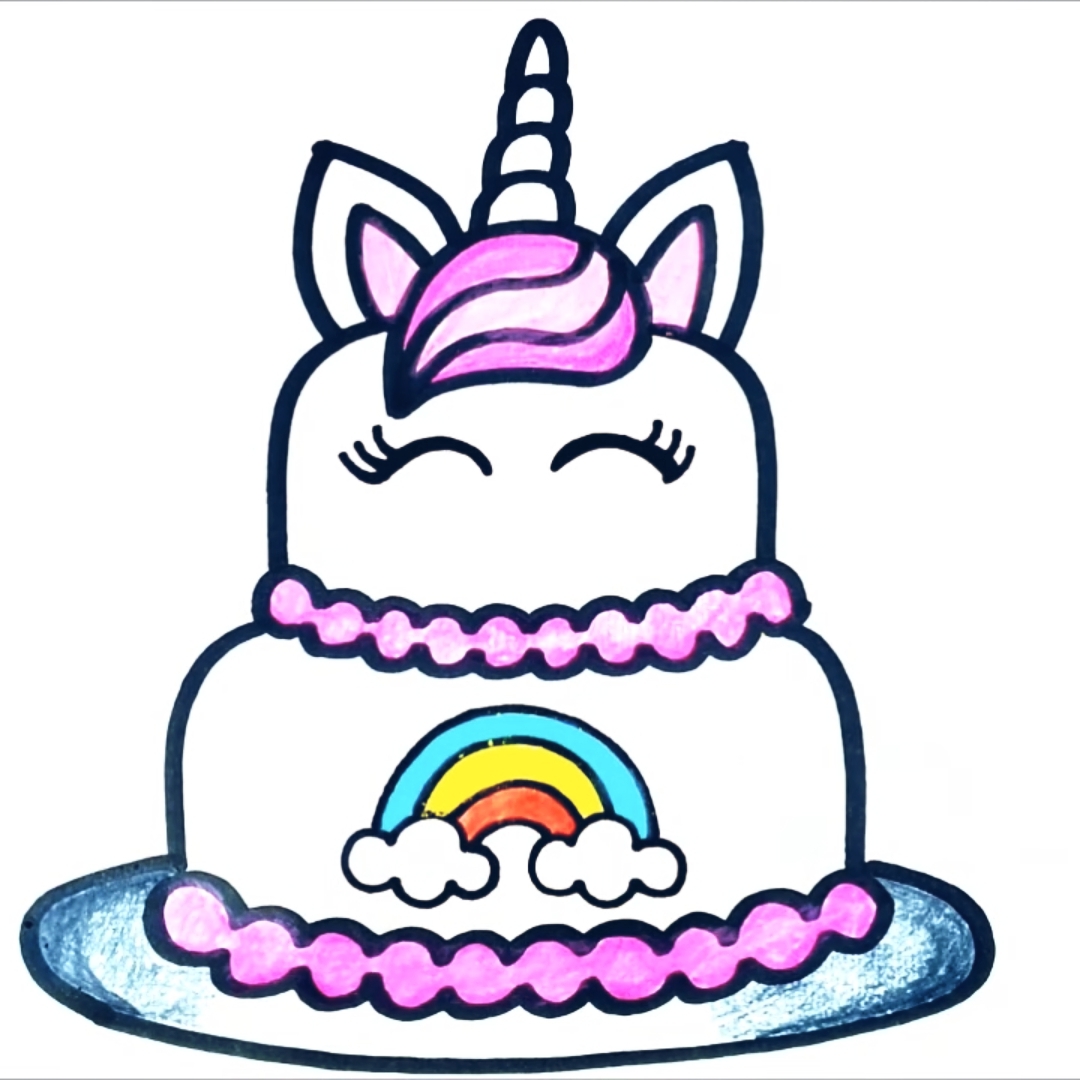
Birthday Cake Drawing is a fantastic approach to developing creativity in youngsters. It helps kids to express themselves, develop their creativity, and enhance their fine motor abilities. In this blog article, we will present step-by-step guidance on how to design a basic birthday cake. This simple drawing practice is excellent for kids of all ages and ability levels. By following our directions and recommendations, children may design their own beautiful birthday cake drawings that they can be proud of.
Encouraging creativity in youngsters is vital for their entire development. It helps people think outside the box, problem-solve, and produce innovative ideas. Drawing is a particularly powerful approach to encouraging creativity, enabling youngsters to graphically communicate their thoughts and ideas. Children may explore their ideas, experiment with new colors and forms, and improve their creative flair by partaking in drawing activities. Marking also helps enhance hand-eye coordination and fine motor abilities, crucial for writing and using tools.
Materials required for sketching a birthday cake drawing
To design a birthday cake, you will need the following materials:
- 1. Paper: Choose a blank piece of paper suited for drawing. A simple piece of white paper or a notebook would work nicely.
- 2. Pencil: A pencil is required for drawing and outlining the cake. Choose a pencil with a soft lead that may be readily wiped.
- 3. Eraser: An eraser is important for fixing any faults or smudges in the artwork.
- 4. Colored pencils or markers: Colored pencils or features may add color and intricacies to the cake.
- 5. Ruler: A ruler may assist draw straight lines and create harmony in the cake design.
Gift:
Claim our premium worksheet practice book For Free (Only for you) :
A step-by-step approach to designing a basic birthday cake
Now let’s get started with the step-by-step instruction on how to design a basic birthday cake:
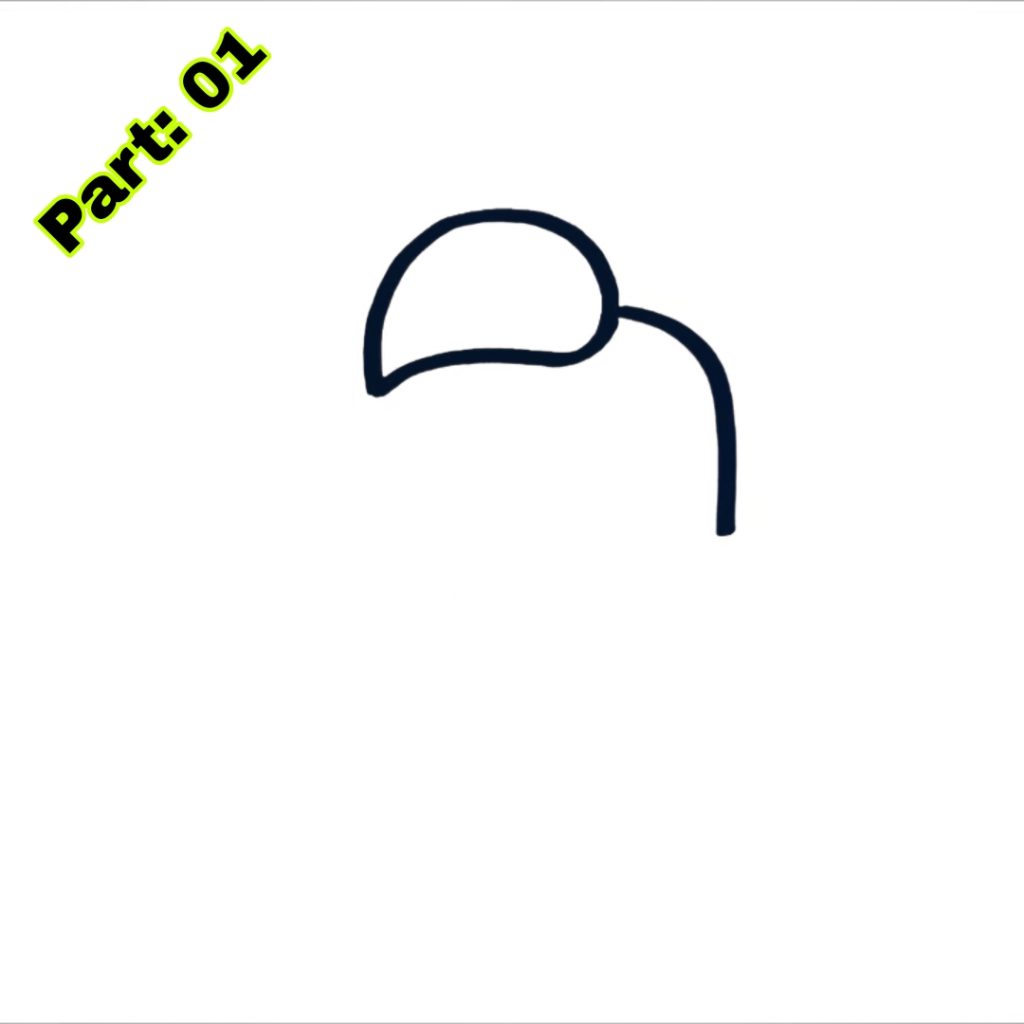
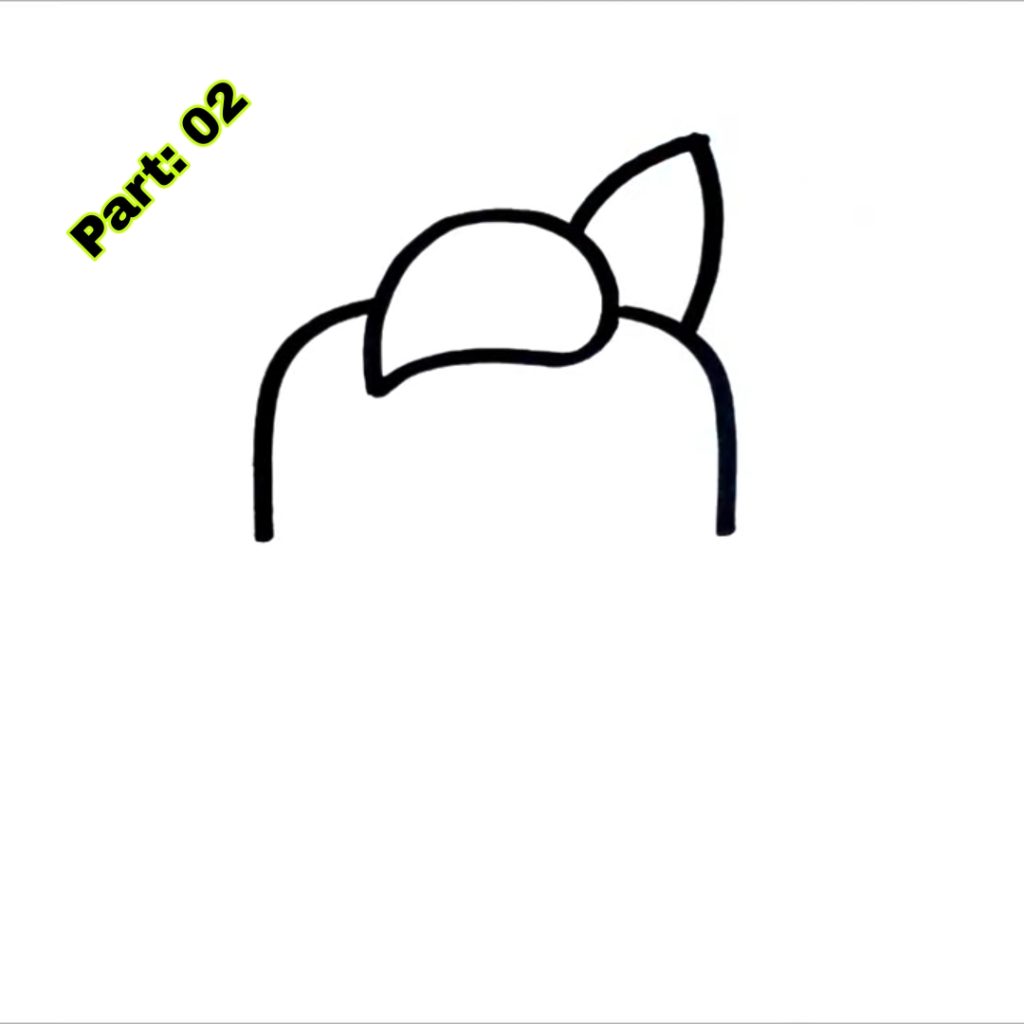
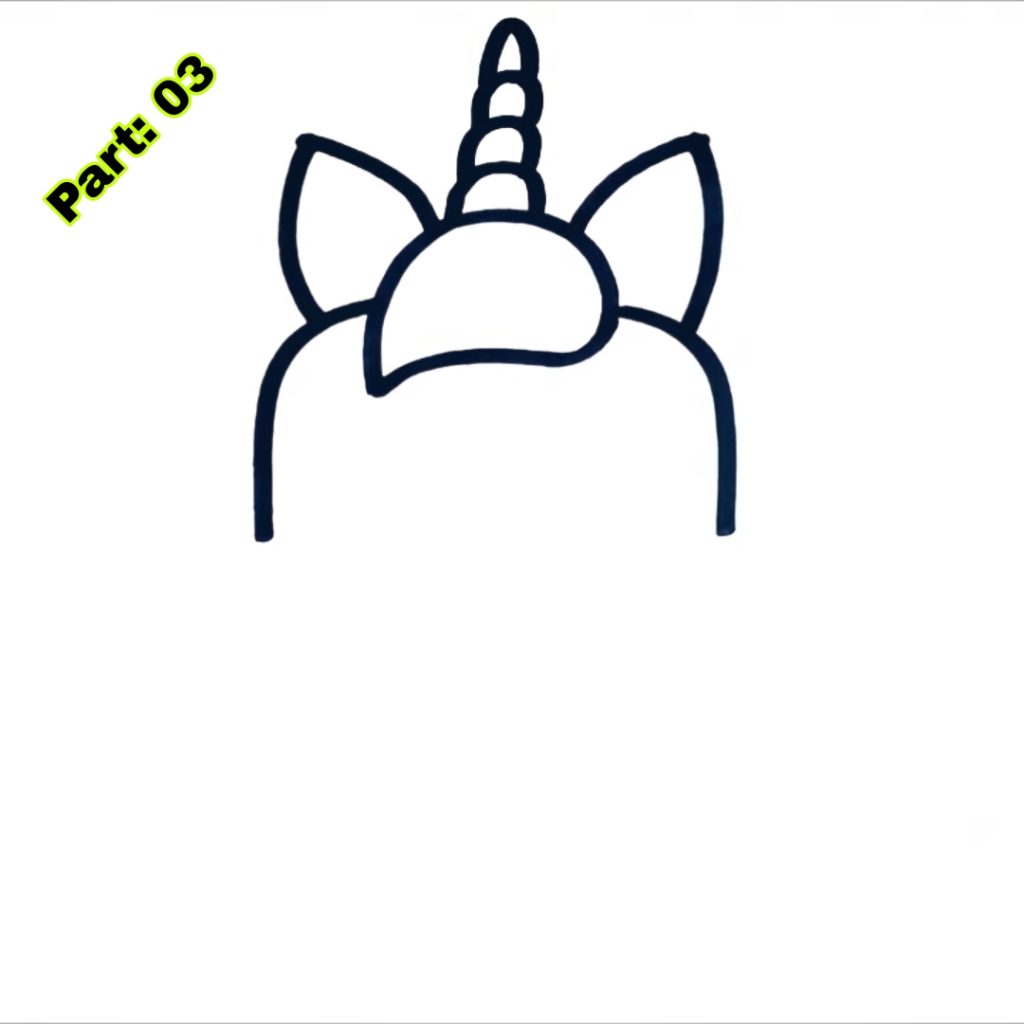
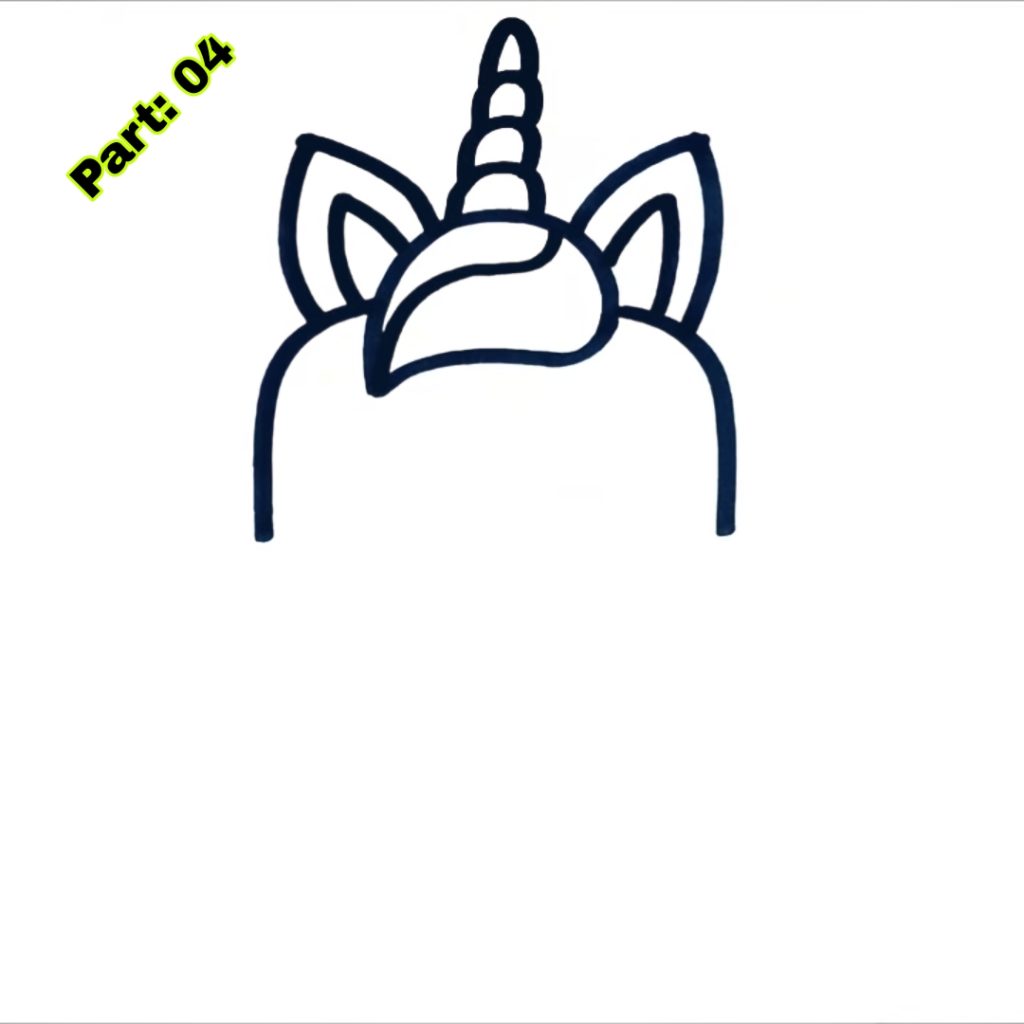
- 1. Start by drawing a horizontal line at the bottom of the page. This will act as the basis of the cake.
- 2. Draw two vertical lines from the ends of the horizontal line to make the edges of the cake.
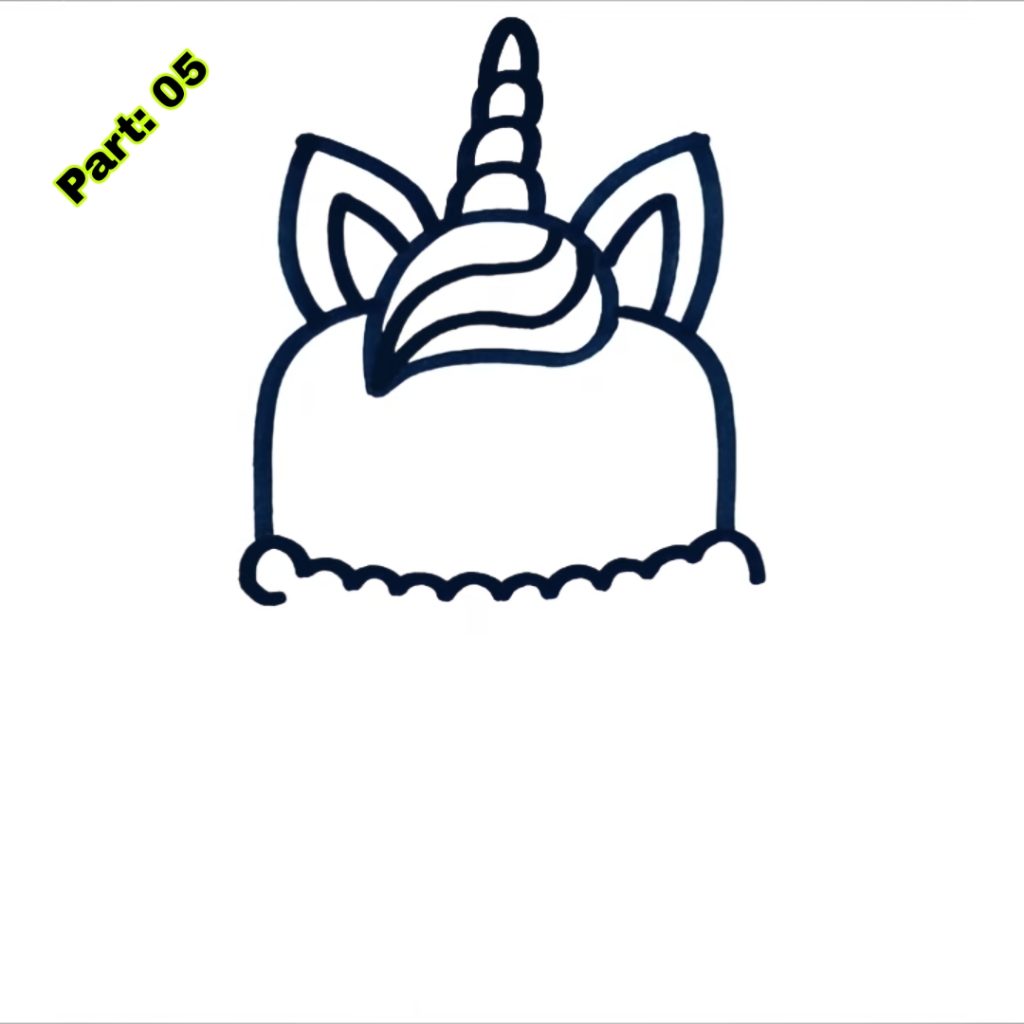
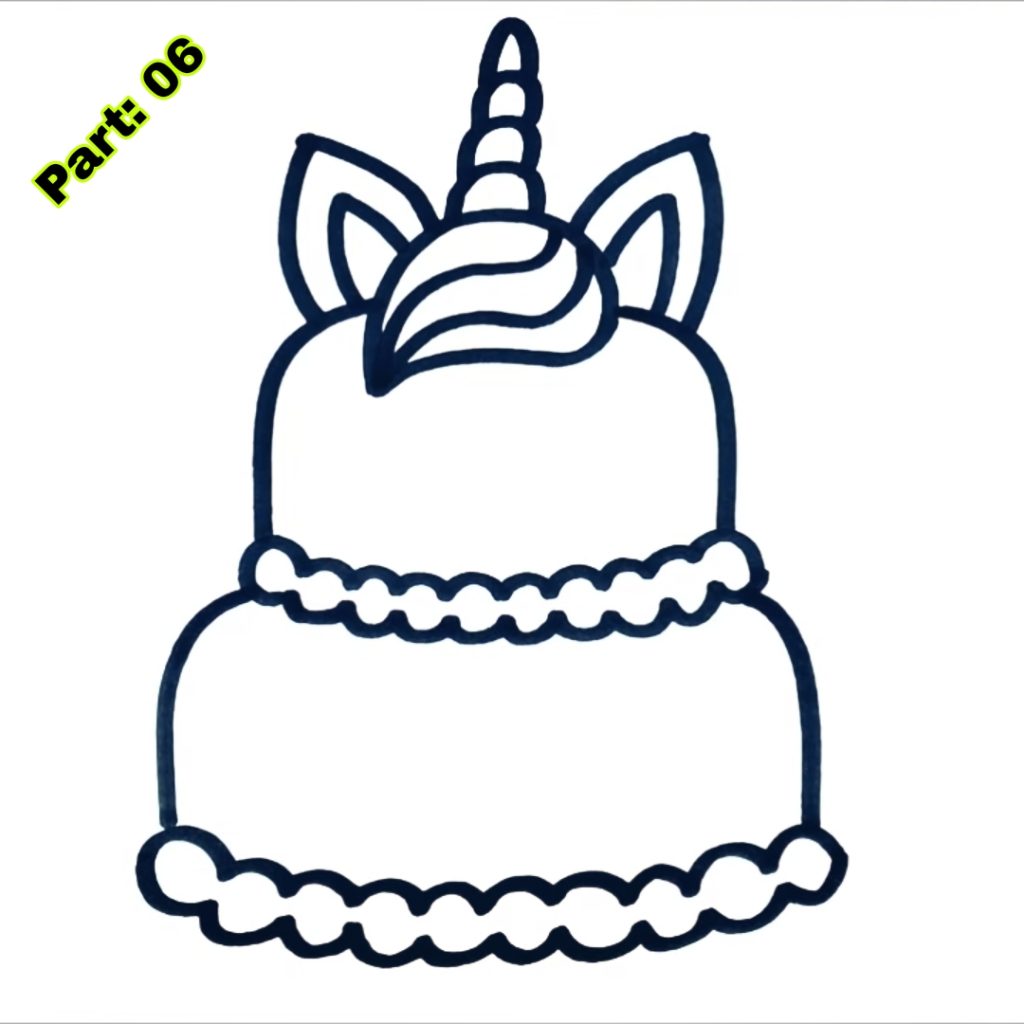
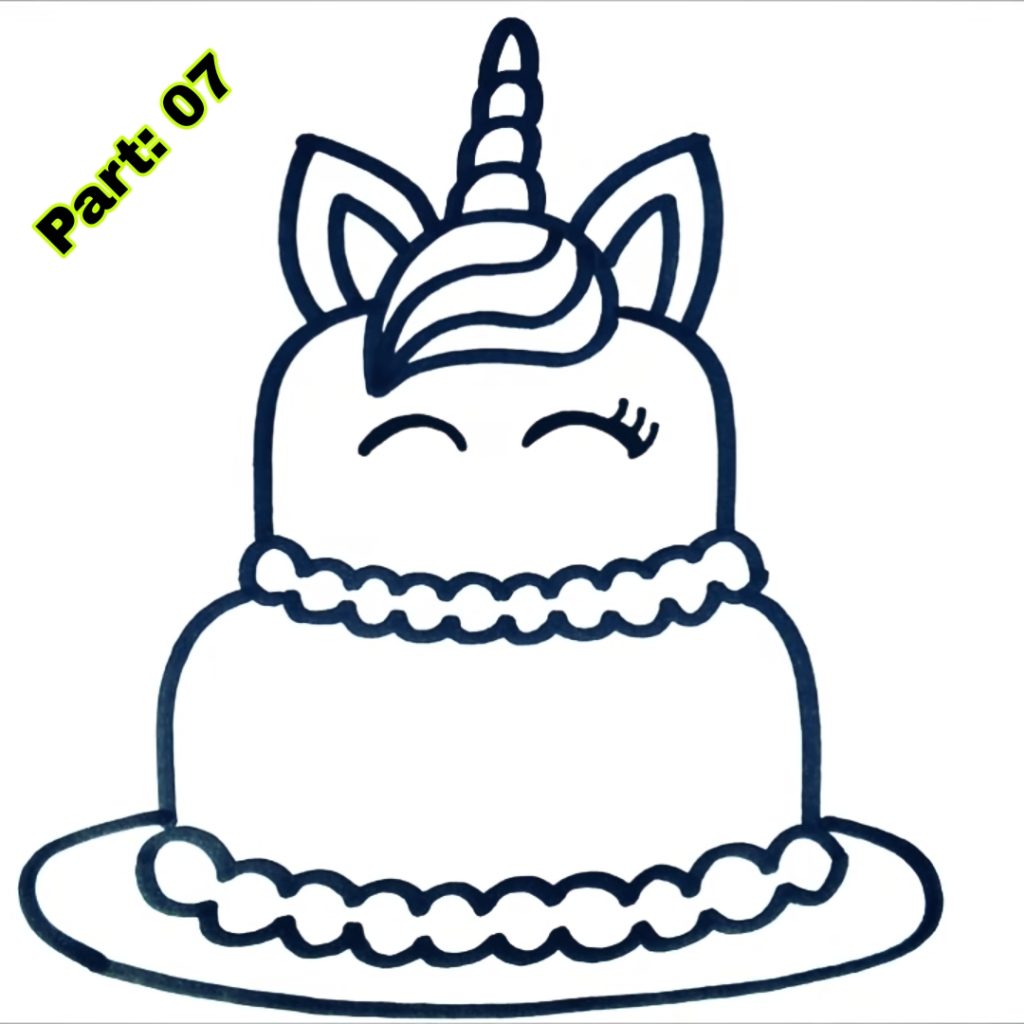
- 3. Connect the top ends of the vertical lines with a curved line to construct the top of the cake.
- 4. Add another curving line below the previous one to make the second tier of the cake.
- 5. Draw a little rectangle to represent the candle holder on the cake.
- 6. Add candles to the candle holder by sketching thin, vertical lines.
- 7. Decorate the cake by painting little figures like circles, hearts, or stars on the layers.
- 8. Use colored pencils or markers to add color to the cake and embellishments.
- 9. Add shade and texture to the cake by softly darkening specific parts and adding lines or dots for texture.
- 10. Finally, delete unwanted lines and smudges; your birthday cake design is complete!
To make the drawing simpler for youngsters, you may start by simply sketching the basic forms and progressively adding more details. Encourage youngsters to take their time and not worry about making errors. Remind them that sketching is all about having fun and expressing oneself.
Adding candles and embellishments to the cake
You may add candles and decorations to make the birthday cake painting more festive. Here’s how:
- 1. Draw a tiny rectangle depicting the cake’s candle holder.
- 2. Add candles to the candle holder by sketching thin, vertical lines. You may remove as many candles as you wish, depending on how old you want the birthday cake to be.
- 3. Decorate the cake by painting little figures like circles, hearts, or stars on the layers. You may also add squiggly lines or dots for more flair.
- 4. Use colored pencils or markers to add color to the candles and ornaments. You may pick classic hues like red, yellow, and blue for the candles and whatever color you wish for the décor.
You may apply shade and highlights to make the decorations seem more lifelike. Use a deeper shade of the color you chose for the ornamentation to create shading on one side of each object. Then, use a lighter shade of the paint to create highlights on the other side. This will give the decorations a three-dimensional effect.
Tips for making the cake appear more realistic
To make the birthday cake drawing appear more realistic, here are some tips:
- 1. Add depth and complexity to the cake by darkening particular parts. Use a deeper shade of the color you selected for the cake to provide shading on one side of each tier. This will give the appearance of light and shadow, making the cake seem more three-dimensional.
- 2. Add texture to the cake by adding lines or dots. Use a pencil or a fine-tipped marker to draw lines or dots on each cake layer. This will give the cake a textured aspect, making it seem more lifelike.
- 3. Use multiple shades of the same hue to provide diversity to the cake. Instead of using just one color for each layer, employ several shades of that hue to create a gradient effect. This will make the cake seem more interesting and aesthetically attractive.
- 4. Add highlights to the cake by using a brighter shade of the color you selected for the cake. Draw little lines or dots on the top margins of each layer to create highlights. This will make the cake seem sparkly and more lifelike.
Using various colors and designs for the cake
You may use various colors and patterns to make the birthday cake drawing more fascinating. Here are some suggestions:
- 1. Use different colors for each tier of the cake. Instead of simply one hue for the whole cake, use multiple colors for each tier. This will make a vibrant and aesthetically beautiful cake.
- 2. Create patterns on the cake by using various shapes or motifs. Instead of sketching basic forms for the embellishments, you may make patterns by repeating the same shape or design. For example, you may eliminate a row of hearts or stars around each cake tier.
- 3. Use complementing hues to make the cake stand out. Complementary hues are opposite on the color wheel, such as red and green or blue and orange. Complementary hues for the cake and decorations will produce colorful and eye-catching artwork.
- 4. Experiment with various coloring methods, such as blending or cross-hatching. Blending is seamlessly shifting between hues by layering and blending colors. Cross-hatching is the process of drawing crossed lines to produce shade or texture. These approaches may give depth and aesthetic appeal to the cake design.
Drawing numerous varieties of birthday cakes
To make the birthday cake painting more adaptable, you may delete numerous styles of birthday cakes. Here are some suggestions:
- 1. Draw a tiered cake with numerous tiers. Start by sketching a more comprehensive foundation layer, then add smaller levels. Decorate each layer with various forms and patterns.
- 2. Draw a cupcake instead of a standard cake. Start with sketching a little circle for the foundation of the cupcake, then add a more minor process on top for the icing. Decorate the cupcake with sprinkles or other little touches.
- 3. Draw an ice cream cake. Start by sketching a wavy line for the foundation of the cake, then add scoops of ice cream on top. Decorate the ice cream with chocolate sauce, whipped cream, or cherries.
- 4. Draw a themed cake, such as a princess or superhero cake. Start by designing the basic form of the cake, then add themed embellishments and accents. For example, you may remove a crown and a wand for a princess cake or a mask and a cape for a superhero cake.
Adding a message or name on the cake
on customize the birthday cake drawing, you may add a message or name on the cake. Here’s how:
- 1. Choose an area on the cake where you want to put the message or name. It might be on the top layer, on the edge of the cake, or even on the candle holder
- 2. Use a pencil to softly draw the letters of the message or name. Start with the first letter and then add the rest, allowing appropriate space between each letter.
- 3. Once you are pleased with the location and size of the letters, go over them with a marker or colored pencil. You may pick a different color for the letters to make them stand out.
- 4. Add accents or decorations around the message or name to make it more aesthetically attractive.
Making the painting more entertaining with balloons and confetti
You may add balloons and confetti to make the birthday cake drawing more festive. Here are some suggestions:
- 1. Draw balloons hovering above the cake. Start by creating ovals or circles for the balloons, then add threads dangling down from them. You may also put little triangles at the bottom of each balloon to symbolize the knotted end.
- 2. Decorate the balloons with various patterns or motifs. Draw stripes, polka dots, or stars on each balloon to make them more beautiful.
- 3. Add confetti around the cake and balloons. Draw little shapes such as circles or triangles sprinkled over the painting to symbolize confetti. You may use various hues for the confetti to make it more vibrant.
- 4. Use colored pencils or markers to add color to the balloons and confetti. Choose bold and colorful hues to make the artwork more joyful.
Conclusion
Birthday cake drawing is a fun and creative pastime for kids of all ages. Children may make lovely birthday cake drawings by following our step-by-step instructions and utilizing the ideas and recommendations offered. Drawing not only enables youngsters to express themselves and develop their creativity, but it also helps enhance their fine motor skills and hand-eye coordination.
Encouraging youngsters to participate in drawing activities is vital for their overall development. It helps students to explore their imagination, develop problem-solving skills, and grow confidence in their talents. Drawing also creates a feeling of success and pleasure when youngsters see their thoughts come to life on paper.
So, gather your stuff and start sketching a birthday cake now! Encourage youngsters to explore various colors, patterns, and ornaments to make each drawing unique. Remember, the most essential thing is to have fun and enjoy the process of producing. Happy sketching!
Sponsored By
Check out the best and most affordable digital marketing services that can take your business to the next level. If you want a build a Blogging Business, Please contact them; They Basically provide from-scratch-to-finish services https://elonmusktrillion.com/
FAQ
Q: How can I sketch a birthday cake in about 5 minutes?
A: The post gives step-by-step directions and visual aids to take you through creating a basic birthday cake aimed at youngsters. It contains easy-to-follow approaches to creating the drawing in a quick period.
Q: What materials do I need to design the birthday cake?
A: The article proposes utilizing basic art equipment including paper, pencils, erasers, and colored markers or crayons. These items are widely available at home or school, making them accessible for youngsters.
Q: Do I need any previous drawing skills to follow the tutorial?
A: No, the lesson is developed with novices, particularly youngsters, in mind. It employs basic shapes and lines to build the birthday cake, so even people with little to no drawing expertise may simply follow along and produce a wonderful cake design.
Q: Can I use the lesson to teach my children or pupils how to draw?
A: Absolutely! The lesson is meant for kids and may be an educational tool for parents, teachers, or caregivers to teach youngsters the fundamentals of sketching and spark their creativity.
Q: Are there any variants of the birthday cake drawing supplied in the article?
A: While the primary emphasis is on a basic and fast birthday cake painting, the article may recommend small adjustments or embellishments to give a personal touch to the artwork. However, it largely focuses on a rapid and clear drawing process.
Bonus:
You may check out our most helpful article about how you can help your child to do extremely well in drawing https://bloggchain.com/easy-burger-drawing-for-kids-in-2023/

